
Introduction: Discovering the Sweet Indulgence of Butterscotch Bars
In the delightful realm of desserts, few treats evoke the same warmth and comfort as a rich, buttery bar of sweetness. Among the many delectable options available, Trisha Yearwood’s Butterscotch Bars stand out as a quintessential favorite, bringing joy to both the baker and those fortunate enough to indulge in them. This recipe is not just about satisfying a sweet tooth; it encapsulates the essence of homemade comfort food and the joy of sharing delicious creations with loved ones.
The beauty of Butterscotch Bars lies in their simplicity and decadence. Crafted with a delightful combination of butterscotch chips, brown sugar, and a hint of vanilla, these bars promise an irresistible sweetness that is both comforting and satisfying. Whether served at a family gathering, a cozy night in, or simply as a treat for yourself, these bars are guaranteed to become a staple in your baking repertoire.
As we delve into the world of Trisha Yearwood’s Butterscotch Bars, this article will guide you through every step of the process—from understanding the essential ingredients that make these bars so special to the step-by-step instructions for creating the perfect batch. Get ready to embark on a sweet journey that will not only satisfy your cravings but also bring a smile to your face.
Understanding the Ingredients: What Makes Butterscotch Bars Special
Exploring the Core Ingredients
1. Unsalted Butter: The foundation of richness in flavor and texture.
– Unsalted butter is the cornerstone of many baking recipes, providing a rich and creamy base. In Trisha Yearwood’s Butterscotch Bars, the unsalted variety is preferred to allow the baker to control the overall saltiness of the dessert. The butter melts into the batter, creating a luscious consistency that enhances the bars’ flavor.
2. Sugars: The role of brown sugar and granulated sugar in achieving the perfect sweetness.
– This recipe calls for both brown sugar and granulated sugar, creating a harmonious balance of sweetness. Brown sugar, with its molasses content, adds depth and moisture, ensuring that the bars remain soft and chewy. Granulated sugar contributes to the bars’ overall sweetness and helps achieve a slightly crisp top layer when baked.
3. Eggs: Binding and moisture—how eggs contribute to the bar’s structure.
– Eggs play an essential role in this recipe by acting as a binding agent. They provide moisture and stability, ensuring that the butterscotch bars hold together beautifully without being overly dense. The proteins in the eggs also contribute to the structure of the bars, creating a satisfying texture.
4. Vanilla Extract: Adding depth and aroma to the flavor profile.
– Vanilla extract is a beloved ingredient in baking, known for its ability to elevate flavors. In this recipe, it adds a warm and inviting aroma, enhancing the overall taste of the butterscotch bars. The combination of vanilla with the sweetness of butterscotch creates a delightful symphony of flavors that is hard to resist.
5. Flour, Baking Powder, and Salt: Essential components for the structure of the bars.
– All-purpose flour serves as the backbone of the bars, providing the necessary structure. Baking powder is included as a leavening agent, ensuring that the bars rise slightly during baking and achieve a light texture. A pinch of salt balances the sweetness, bringing out the flavors of the other ingredients.
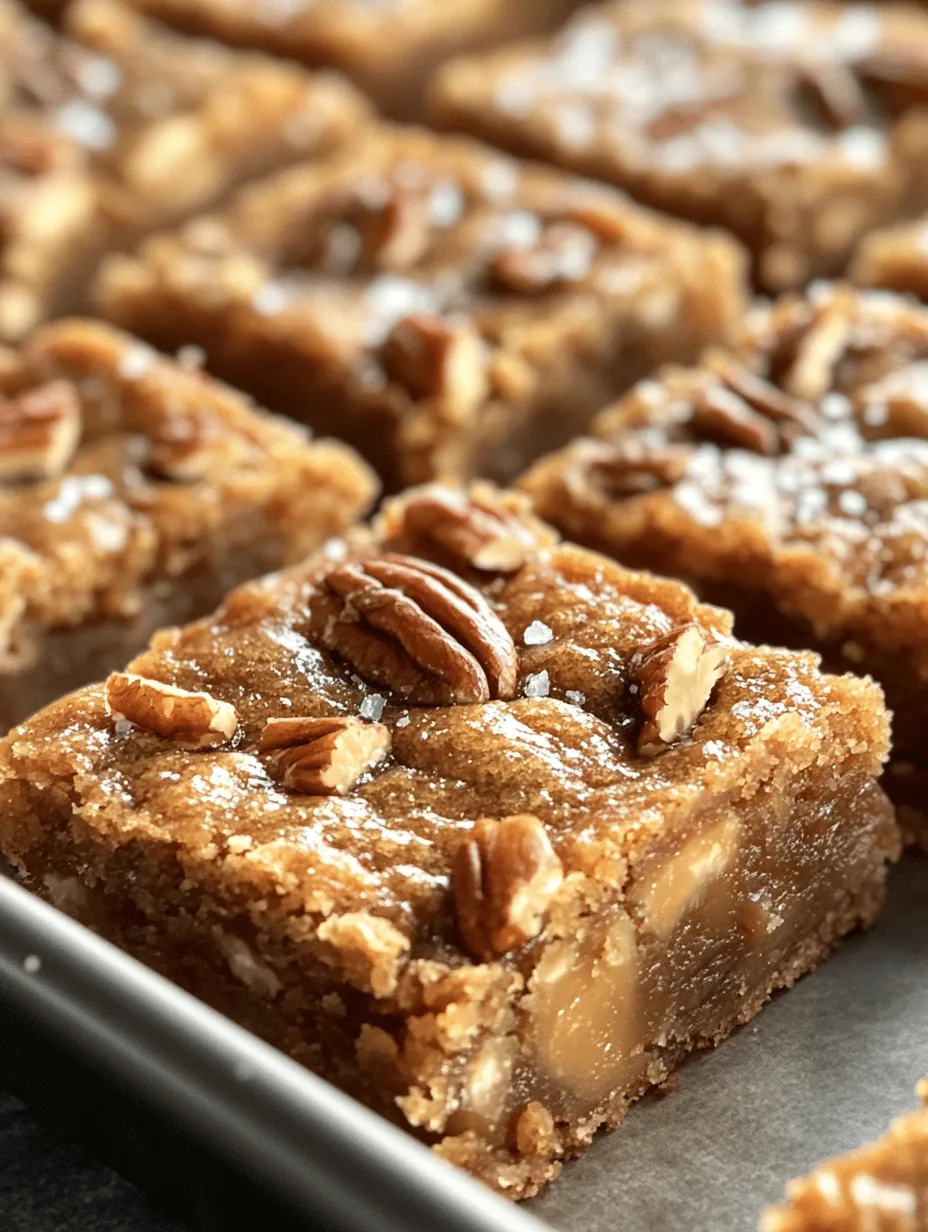
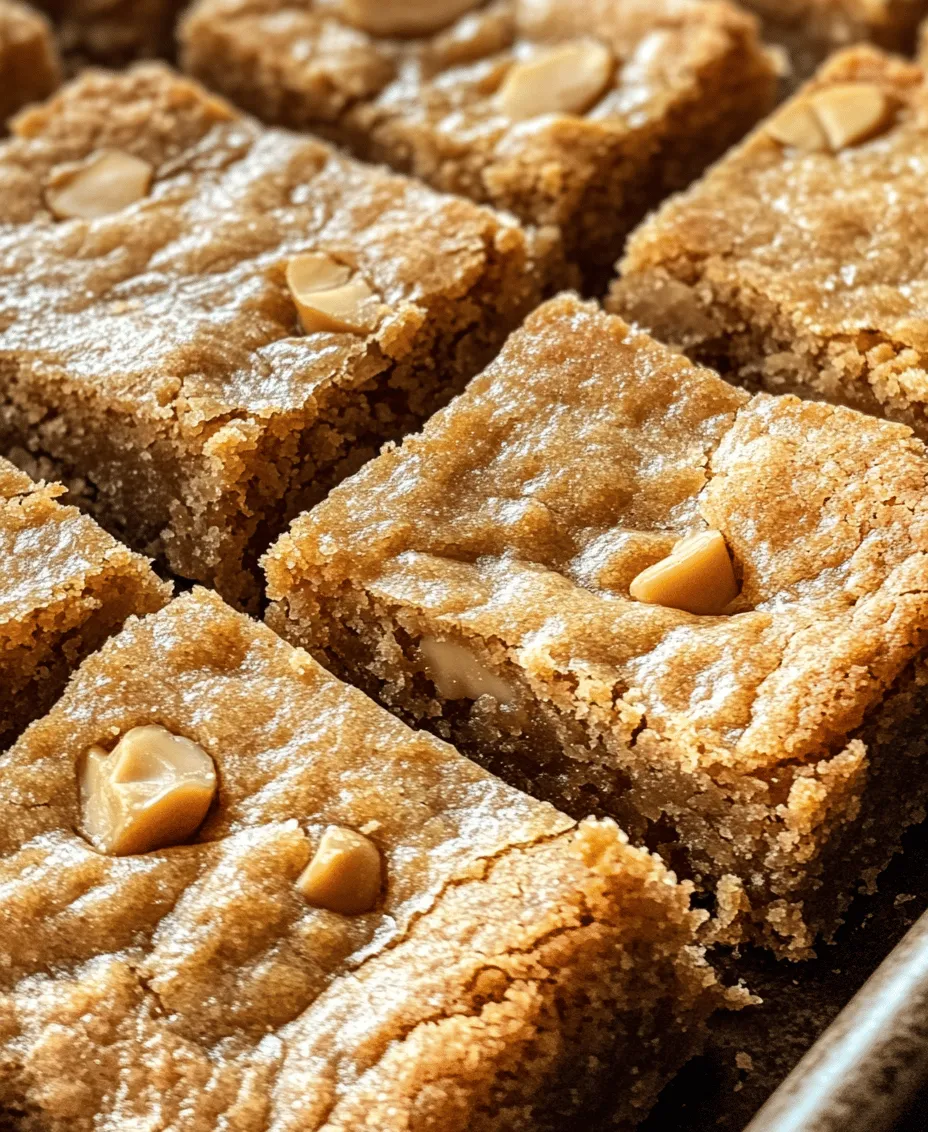
6. Butterscotch Chips: The star ingredient that elevates the dessert.
– The most crucial ingredient in this recipe, butterscotch chips, are what truly define these bars. Melting into the batter, they create pockets of gooey sweetness that every bite craves. Their rich, buttery flavor is what sets this dessert apart, making it a standout treat.
7. Chopped Nuts: Optional additions that add texture and flavor.
– While not mandatory, adding chopped nuts—such as pecans or walnuts—can provide an enjoyable crunch and additional flavor. The combination of creamy butterscotch with crunchy nuts creates a delightful contrast that elevates the overall eating experience.
Step-by-Step Instructions: Crafting the Perfect Butterscotch Bars
Prepping Your Kitchen: Essential Tools and Equipment
Before diving into the baking process, it’s essential to prepare your kitchen with the necessary tools and equipment. Having everything ready will streamline your baking experience and ensure that you have all you need to create these delicious bars. Here’s a brief overview of the essential items you’ll require:
– Mixing Bowls: A large mixing bowl for combining ingredients and a smaller one for whisking eggs.
– Whisk or Electric Mixer: To mix the batter thoroughly until smooth and creamy.
– Rubber Spatula: For folding in the dry ingredients and scraping down the sides of the bowl.
– Baking Pan: A 9×13-inch baking pan is ideal for this recipe, allowing the bars to bake evenly.
– Parchment Paper: Lining the pan with parchment paper will make it easier to remove the bars after baking.
– Measuring Cups and Spoons: Accurate measurements are crucial for the perfect texture and flavor.
– Oven Mitts: Safety first! Don’t forget your mitts for handling hot pans.
Preheat the Oven: Setting the Stage for Baking
Preheating your oven is a crucial step in the baking process. It ensures that your butterscotch bars cook evenly and achieve that perfect golden-brown finish. Set your oven temperature to 350°F (175°C) and allow it to fully preheat while you prepare the batter. Additionally, prepare your baking pan by lining it with parchment paper, leaving a bit of overhang on the sides to make lifting the bars out easier once they’re baked.
Creating the Batter: Mixing Wet Ingredients
With your kitchen prepped and the oven preheating, it’s time to create the batter that will transform into delicious butterscotch bars. Start by melting 1 cup of unsalted butter in a microwave-safe bowl or on the stove. Allow it to cool slightly before proceeding. In a large mixing bowl, combine the melted butter with 1 cup of brown sugar and 1/2 cup of granulated sugar. Using a whisk or electric mixer, beat the mixture until it becomes smooth and creamy, ensuring that the sugars are well incorporated.
Next, add in two large eggs and 1 teaspoon of pure vanilla extract. Mix until combined, making sure to scrape down the sides of the bowl as necessary. The batter should be thick and glossy at this point, with a rich, buttery aroma wafting through your kitchen.
Incorporating Dry Ingredients: The Art of Combination
Once your wet ingredients are mixed, it’s time to incorporate the dry ingredients. In a separate bowl, whisk together 2 cups of all-purpose flour, 1 teaspoon of baking powder, and a pinch of salt. Gradually add this dry mixture to the wet ingredients, stirring gently with a rubber spatula or wooden spoon. Be careful not to overmix; you want just enough blending to combine the ingredients into a thick, cohesive batter.
After the flour is incorporated, fold in 1 cup of butterscotch chips, ensuring they are evenly distributed throughout the batter. If you choose to include chopped nuts, now is the time to fold in 1/2 cup of your preferred variety. The combination of gooey butterscotch chips and crunchy nuts creates a delightful texture that will keep everyone coming back for more.
With the batter ready, you’re one step closer to enjoying the sweet indulgence of Trisha Yearwood’s Butterscotch Bars. Each step brings you nearer to a treat that’s perfect for any occasion—so let’s get ready to bake!
Tips on Blending Wet and Dry Ingredients Without Overmixing
One of the keys to achieving the perfect texture in Trisha Yearwood’s Butterscotch Bars is the method used to blend the wet and dry ingredients. Overmixing can lead to tough bars, which is not what you want for this indulgent treat. Here are some tips to ensure you achieve the ideal consistency:
1. Mix Separately: Begin by mixing the dry ingredients (like flour, baking powder, and salt) in one bowl and the wet ingredients (such as eggs, melted butter, and brown sugar) in another. This separation allows you to incorporate them into each other more effectively.
2. Use a Rubber Spatula: When combining the wet and dry ingredients, use a rubber spatula instead of a whisk or electric mixer. A spatula helps you fold the ingredients gently, allowing them to come together without developing gluten, which can make the bars tough.
3. Fold, Don’t Stir: Gently fold the dry ingredients into the wet ingredients until just combined. You should still see a few streaks of flour; it’s okay! The goal is to unite the ingredients without overworking the batter.
4. Add Mix-ins Last: If you’re incorporating butterscotch chips and nuts, add them after the batter is mixed. This will help ensure they do not get overmixed and break down, preserving their texture and flavor.
Adding Flavor and Texture: Butterscotch Chips and Nuts
Butterscotch chips are the star of this recipe, providing a rich, creamy flavor that perfectly complements the bars’ sweetness. Here’s how to evenly distribute these chips along with any optional nuts you may want to add:
1. Measure Properly: Use measuring cups to ensure you have the right amount of butterscotch chips. Typically, a cup or cup and a half will suffice, depending on your preference for sweetness.
2. Toss with Flour: Before adding the butterscotch chips (and any nuts), toss them in a light dusting of flour. This helps prevent them from sinking to the bottom during baking, allowing for an even distribution throughout the bars.
3. Fold Gently: Once the batter is ready, gently fold in your butterscotch chips and nuts (if using). Make sure they are evenly spread throughout the batter, but avoid overmixing as discussed previously.
Baking to Perfection: Timing and Temperature
The baking process is crucial for achieving the desired texture and flavor in your butterscotch bars. Here’s how to ensure they come out perfectly every time:
1. Preheat Your Oven: Always preheat your oven to 350°F (175°C) before placing your baking dish inside. This ensures even cooking from the start.
2. Check for Doneness: After about 25-30 minutes, start checking for doneness. The bars should be golden brown around the edges, and the center should be set but slightly soft. A toothpick inserted into the center should come out with a few moist crumbs attached, indicating they are done but not overbaked.
3. Avoid Opening the Oven: Try not to open the oven door too frequently while baking. This can cause fluctuations in temperature, which may affect the baking time and final texture.
Cooling and Cutting: Achieving the Ideal Texture
Once your butterscotch bars are baked to perfection, it’s essential to cool and cut them properly to maintain their texture and ease of serving.
1. Cool in the Pan: Allow the bars to cool in the baking dish for at least 10-15 minutes after removing them from the oven. This helps them set further and makes cutting easier.
2. Transfer to a Wire Rack: After cooling slightly, transfer the bars to a wire rack to cool completely. This prevents them from becoming soggy on the bottom and helps maintain a nice firm texture.
3. Use a Sharp Knife: Once cooled, use a sharp knife to cut the bars into uniform pieces. Cleaning the knife between cuts can help maintain clean edges.
Serving Suggestions: Enjoying Your Butterscotch Bars
Trisha Yearwood’s Butterscotch Bars are delicious on their own, but they can be enhanced with thoughtful serving suggestions that elevate the experience.
Pairing Ideas: Complementing the Sweetness
These bars pair beautifully with various beverages. Here are a few suggestions:
– Coffee: A rich cup of coffee complements the sweetness of the butterscotch bars perfectly. The slight bitterness of the coffee balances the sugary flavors, making each bite more enjoyable.
– Tea: For a lighter option, consider serving these bars with a cup of herbal tea, such as chamomile or mint. The calming properties of tea enhance the experience of indulging in a sweet treat.
– Milk: A classic pairing, a glass of cold milk is always a great choice to wash down the sweetness of butterscotch bars, particularly for kids and those young at heart.
Presenting Your Bars: Creative Serving Options
When it comes to serving your butterscotch bars, presentation can make a significant impact. Here are a few creative ideas:
1. Dessert Platter: Arrange the bars on a decorative platter, garnished with a sprinkle of sea salt or a drizzle of caramel sauce. This adds a touch of elegance, perfect for gatherings or parties.
2. Gift Boxes: Package individual bars in decorative boxes or bags tied with a ribbon. They make for thoughtful homemade gifts for friends and family, especially during holidays or special occasions.
3. A La Mode: Serve the bars warm with a scoop of vanilla ice cream on top. This combination of warm, gooey bars and cold ice cream is irresistibly delicious.
The Joy of Homemade Treats: Why Butterscotch Bars Matter
Homemade desserts, like Trisha Yearwood’s Butterscotch Bars, carry a unique significance beyond mere satisfaction of the sweet tooth. They evoke feelings of nostalgia and comfort, and the act of baking can be a powerful way to connect with loved ones.
Nostalgia and Comfort: The Emotional Connection to Baking
Baking often brings back cherished memories of family gatherings, holiday celebrations, or quiet afternoons in the kitchen. The scent of butterscotch wafting through the air may remind you of time spent with loved ones, sharing stories and laughter over fresh baked goods. Such experiences create bonds and foster a sense of belonging, making these bars not just a treat but a vessel for memories.
Sharing with Loved Ones: Building Connections Through Food
Food has a remarkable ability to bring people together. Whether it’s enjoying a tray of butterscotch bars at a family reunion or sharing them with neighbors, the act of offering homemade treats nurtures relationships and builds connections. These bars can serve as a sweet gesture of love and friendship, inviting others to indulge in the joy of your baking.
Conclusion: Embracing the Sweetness of Life with Butterscotch Bars
Trisha Yearwood’s Butterscotch Bars are more than just a dessert; they are a celebration of sweetness, togetherness, and the joy of homemade treats. With their rich flavors and delightful texture, these bars are perfect for any occasion, whether it’s a cozy family gathering or a lively celebration with friends. By following the detailed steps and tips outlined in this guide, you’ll be able to create a batch of these delicious bars that will leave a lasting impression on everyone lucky enough to enjoy them.
Embrace the joy of baking and indulge in the sweetness that these butterscotch bars bring to your life. Share them with loved ones, savor each bite, and create lasting memories with every batch. So, roll up your sleeves, gather your ingredients, and embark on the delightful adventure of baking Trisha Yearwood’s Butterscotch Bars today!