
Introduction
There’s something undeniably joyful about making homemade ice cream. The process evokes a sense of nostalgia, reminding us of warm summer days spent with family and friends, laughter ringing out as we indulge in a sweet, frozen treat. While store-bought ice cream can satisfy our cravings, homemade versions offer a level of freshness, quality, and flavor that is simply unmatched.
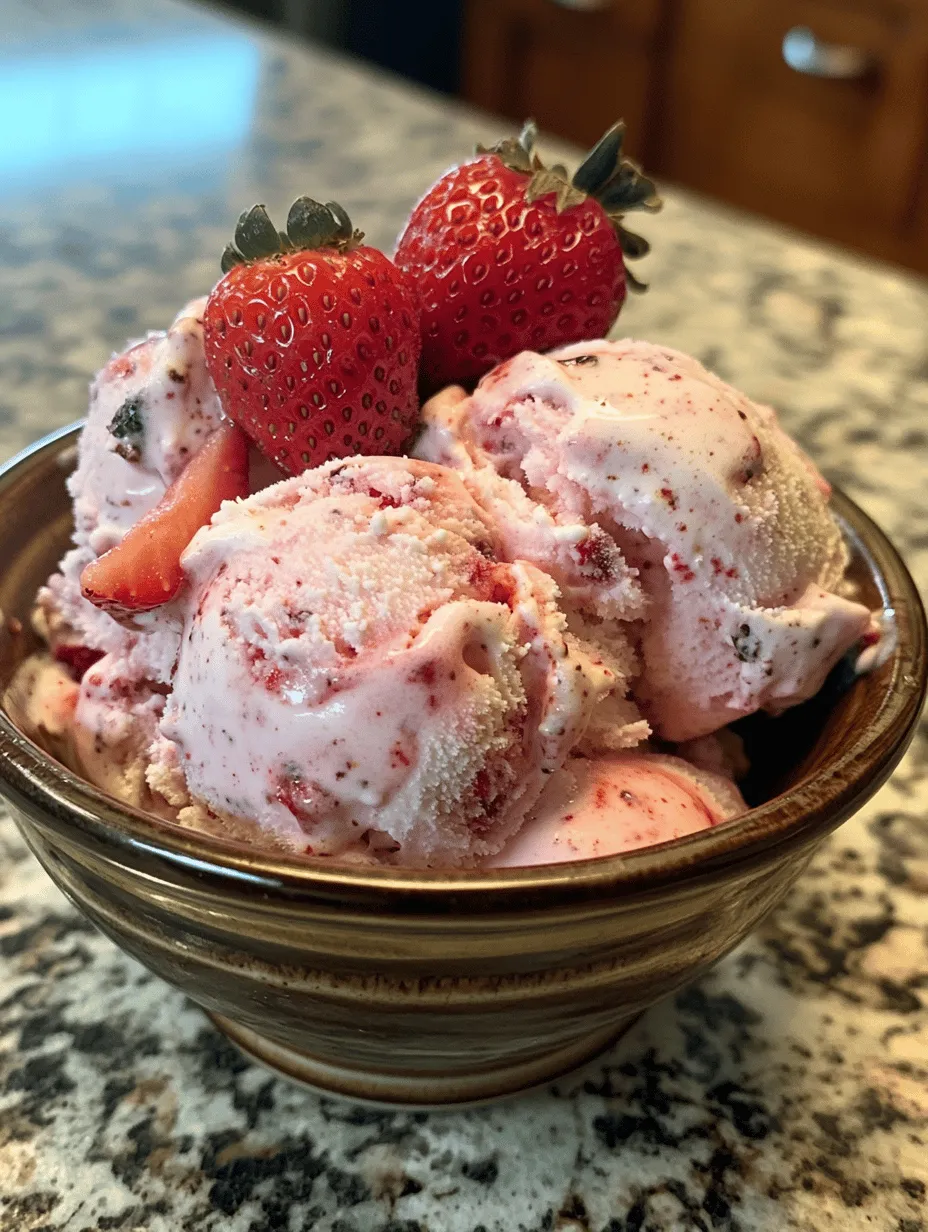
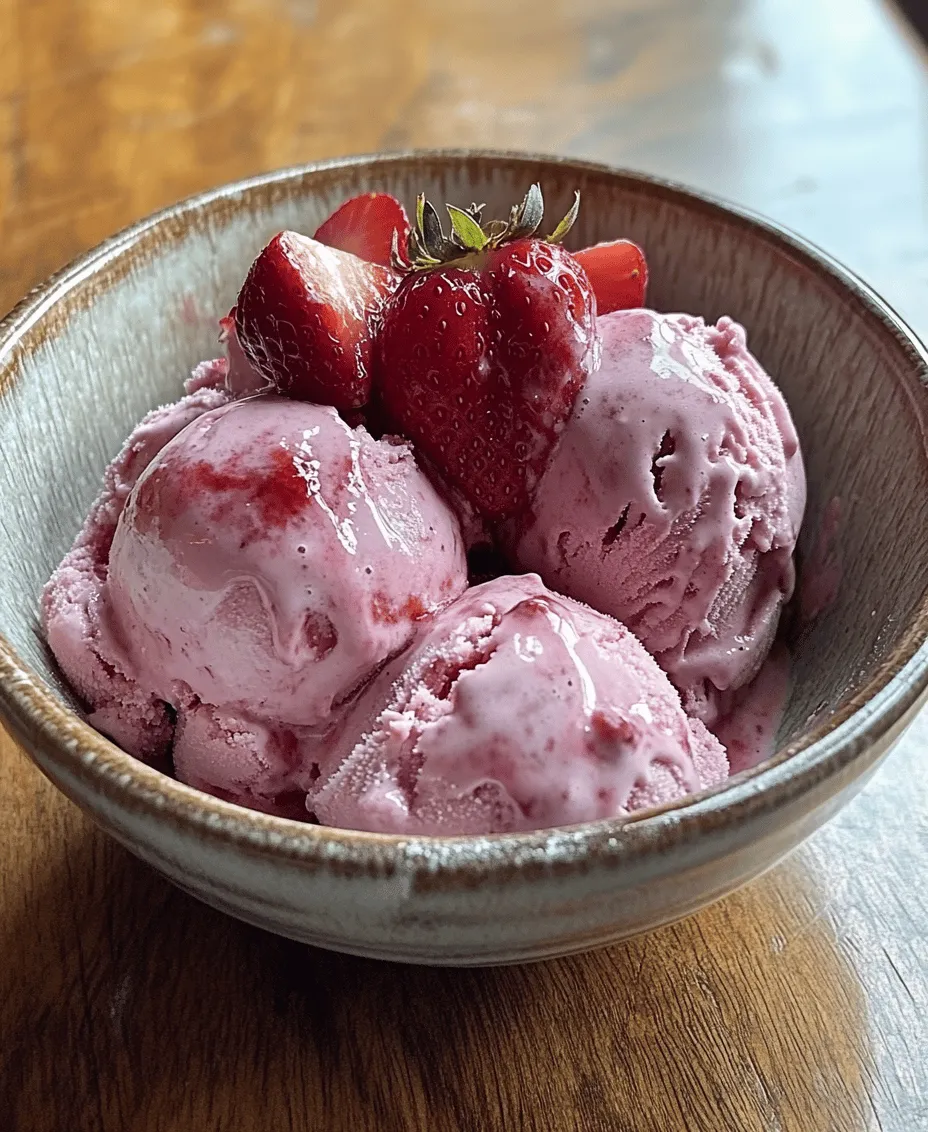
One of the most delightful recipes you can create in your own kitchen is the Strawberry Vanilla Bean Dream Ice Cream. This luscious dessert combines the vibrant sweetness of ripe strawberries with the creamy richness of vanilla bean, resulting in a flavor experience that is as refreshing as it is indulgent. The use of fresh, high-quality ingredients is crucial in elevating this dish, ensuring that each scoop is bursting with flavor and texture that store-bought alternatives simply cannot replicate.
In this article, we will explore the beauty of homemade ice cream with a specific focus on crafting the perfect Strawberry Vanilla Bean Dream Ice Cream. We will break down the key ingredients that contribute to its unique taste and texture, and guide you through a step-by-step process to create this creamy delight in your own kitchen.
Understanding the Ingredients
To create the best Strawberry Vanilla Bean Dream Ice Cream, it’s essential to understand the role that each ingredient plays in the recipe. This knowledge not only enhances your cooking skills but also allows you to appreciate the nuances of the flavors in your final product. Let’s dive into the primary ingredients that make this ice cream a standout treat.
Fresh Strawberries
Strawberries are the star of this recipe, providing a natural sweetness and vibrant flavor that is both refreshing and indulgent. Not only do they taste divine, but they also come with a host of nutritional benefits. Strawberries are rich in vitamins C and K, antioxidants, and fiber, making them a healthy addition to your diet. Their natural acidity helps to balance the sweetness of the ice cream, creating a harmonious blend of flavors.
When selecting strawberries for your ice cream, opt for fresh, ripe berries that are deep red and free from blemishes. The fresher the strawberries, the more intense their flavor will be, which is crucial for achieving that desired fruity burst in your ice cream.
Granulated Sugar
Sugar is not merely a sweetener; it plays a vital role in the texture of ice cream. Granulated sugar helps to create a smooth and creamy consistency by lowering the freezing point of the mixture. This prevents large ice crystals from forming and results in a silky mouthfeel.
When making ice cream, it’s important to measure the sugar accurately to achieve the right balance of sweetness. Too little sugar can lead to an icy texture, while too much can overwhelm the other flavors. The sugar you choose can also impact the overall taste, so consider using organic cane sugar for a more refined flavor profile.
Whole Milk and Heavy Cream
The combination of whole milk and heavy cream is what gives this ice cream its luxurious creaminess. Whole milk contributes to the base, providing a lighter consistency, while heavy cream adds richness and a velvety texture. Together, they create a balance that is both satisfying and indulgent.
Using high-quality dairy is essential in this recipe. Whole milk should be fresh and full-fat, while heavy cream should have a high butterfat content (around 36% or more) for optimal creaminess. The right dairy blend ensures that your ice cream has a rich mouthfeel that melts beautifully on the tongue.
Pure Vanilla Extract and Vanilla Bean
Vanilla is often referred to as the flavor enhancer in many desserts, and for good reason. The addition of pure vanilla extract, along with the seeds scraped from a vanilla bean, elevates the flavor complexity of the Strawberry Vanilla Bean Dream Ice Cream.
Pure vanilla extract is made from real vanilla beans, imparting a deep, aromatic flavor that artificial vanilla simply cannot replicate. The vanilla bean adds another layer of richness, with its tiny specks of seeds providing visual interest and an intense vanilla flavor. When combined, these two ingredients create a beautifully balanced base that complements the strawberries perfectly.
Salt and Lemon Juice
While salt might seem like an unusual addition to ice cream, it plays a crucial role in balancing flavors. A pinch of salt enhances the sweetness of the strawberries and the richness of the cream, ensuring that no single flavor overpowers the others.
Similarly, a splash of lemon juice adds brightness to the mixture, cutting through the creaminess and lifting the overall flavor profile. The acidity from the lemon juice enhances the natural sweetness of the strawberries and adds a refreshing note to each bite.
Step-by-Step Guide to Making Strawberry Vanilla Bean Dream Ice Cream
Now that we have a solid understanding of the ingredients, let’s move on to the exciting part: making your own Strawberry Vanilla Bean Dream Ice Cream! This process is both enjoyable and straightforward, making it a perfect project for both novice and experienced home cooks.
Emphasizing the Ease of Preparation
One of the best aspects of making ice cream at home is how simple it can be. With just a few easy steps, you can create a delightful dessert that will impress friends and family alike. While traditional ice cream recipes may require an ice cream maker, this recipe can also be adapted for those without specialized equipment.
Preparation of Strawberries: The Maceration Process Explained
The first step in creating your ice cream is preparing the strawberries. This involves the maceration process, which enhances their natural sweetness and flavor.
1. Wash and Hull the Strawberries: Begin by thoroughly washing the strawberries under cold water to remove any dirt or pesticides. Once cleaned, remove the green tops (hulling) and slice the strawberries into quarters.
2. Macerate the Strawberries: Place the sliced strawberries in a mixing bowl and sprinkle them with granulated sugar. The sugar will draw out the juices from the berries, creating a sweet syrup. Allow the strawberries to sit for about 15-20 minutes, stirring occasionally. This process not only enhances the flavor but also ensures that your ice cream has a luscious strawberry base.
Combining Dairy Ingredients: Importance of Thorough Mixing
While the strawberries are macerating, you can prepare the dairy base for your ice cream. This step is crucial for achieving a smooth and creamy texture.
1. Mix the Dairy Ingredients: In a separate mixing bowl, combine the whole milk and heavy cream. Use a whisk to thoroughly blend the two together until well combined.
2. Add Vanilla and Salt: Next, stir in the pure vanilla extract and a pinch of salt. Mixing these ingredients well ensures that the flavors are evenly distributed throughout the ice cream base.
Incorporating Macerated Strawberries: How to Fold Without Losing Texture
Once the strawberries have macerated and released their juices, it’s time to incorporate them into the dairy mixture. This step requires a gentle touch to maintain the integrity of the strawberries.
1. Combine the Mixtures: Pour the macerated strawberries, along with their syrup, into the bowl with the dairy mixture.
2. Folding Technique: Using a spatula, carefully fold the strawberry mixture into the dairy base. Be gentle to avoid breaking down the strawberries too much; you want to maintain some chunks for texture and visual appeal in your final ice cream.
By following these initial steps, you will have laid the groundwork for a delicious batch of Strawberry Vanilla Bean Dream Ice Cream. The combination of fresh strawberries, rich dairy, and aromatic vanilla will create a frozen treat that is sure to become a favorite in your household. As we move forward, we’ll delve into the freezing process and additional tips to ensure your ice cream turns out perfectly creamy and irresistibly flavorful.
Stay tuned for the next part of this delightful recipe, where we will explore the freezing techniques and additional tips to elevate your homemade ice cream experience even further.
Churning Process: What to Expect in Terms of Consistency
Once you’ve combined your ingredients and prepared your ice cream base, the next crucial step is the churning process. This is where the magic happens, transforming your creamy mixture into a delightful treat. When you pour your strawberry vanilla bean mixture into the ice cream maker, expect to see it gradually thicken and become smooth as it churns.
During this process, the ice cream maker incorporates air into the mixture, which is essential for achieving that light and airy texture. Depending on your machine, it usually takes about 20 to 30 minutes of churning for the ice cream to reach a soft-serve consistency. You’ll know it’s time to stop when the mixture has increased in volume and has a velvety smoothness, resembling a thick shake.
Remember, the ice cream will still be quite soft at this point, which is perfectly normal and is just a prelude to the final freezing stage. If you prefer a denser texture, you’ll want to ensure you give your ice cream enough time to firm up in the freezer after churning.
Freezing for Firmness: Importance of the Final Freezing Stage
After churning, transfer your soft ice cream into a shallow container. It’s crucial to spread it evenly to help it freeze more uniformly. Cover the container tightly with plastic wrap or a lid to prevent ice crystals from forming and to avoid absorbing any unwanted flavors from your freezer.
Place the container in the coldest part of your freezer, ideally at a temperature of 0°F (-18°C) or lower. Allow the ice cream to freeze for at least 4 hours, but overnight is even better. This final freeze is essential for transforming the soft, airy mixture into the scoopable, creamy ice cream you crave.
It’s during this stage that the flavors deepen, and the texture becomes truly delightful. Patience is key here, as letting it freeze adequately will reward you with a perfect, creamy dessert that holds its shape when served.
The Science Behind Ice Cream Making
To truly appreciate your homemade Strawberry Vanilla Bean Dream Ice Cream, it’s helpful to understand the science behind ice cream making. The combination of churning and freezing is what creates the unique texture and flavor profile of ice cream.
Explanation of How Ice Cream is Formed Through Churning and Freezing
When you churn your ice cream mixture, you’re not just blending ingredients; you’re also incorporating air into the mixture. This process is known as “overrun.” The more air that is whipped into the ice cream, the lighter and fluffier the final product will be. However, there’s a balance to maintain. Too much air can create a texture that feels more like frozen fluff than rich ice cream.
As the mixture churns and cools, small ice crystals begin to form. The goal is to create tiny, uniform ice crystals to ensure a smooth mouthfeel. If the mixture freezes too quickly or without sufficient churning, larger ice crystals can form, resulting in an undesirable grainy texture.
The Role of Air Incorporation in Achieving the Right Texture
Incorporating air is crucial for achieving that luxurious, creamy texture. The air creates tiny pockets that make the ice cream light and prevents it from becoming overly dense. Commercial ice creams often have higher overrun percentages, which is why they can feel airy and light compared to homemade versions. However, with our homemade recipe, you can still achieve a delightful balance of creaminess and fluffiness with proper churning.
Discussion on the Importance of Temperature Control in Achieving the Perfect Scoop
Temperature control is fundamental in ice cream making. The ideal serving temperature for ice cream is around 6°F (-14°C) to 10°F (-12°C). At this range, the ice cream is soft enough to scoop without melting too quickly but firm enough to hold its shape. If your ice cream is too cold, it can become rock hard, making it difficult to serve. Conversely, if it’s too warm, it can lose its structure and melt too fast.
To ensure the best experience, consider letting your ice cream sit at room temperature for a few minutes before serving. This will make scooping easier and allow the flavors to shine.
Serving Suggestions and Pairing Ideas
Now that you have your delicious Strawberry Vanilla Bean Dream Ice Cream ready, it’s time to think about how to serve it. Presentation can enhance the overall experience, and there are countless ways to make your homemade ice cream look as good as it tastes.
Suggestions for Serving: How to Present the Ice Cream Beautifully
Start with a beautiful serving bowl or dish. Consider using glass or ceramic bowls that reflect the vibrant colors of your ice cream. You can also use waffle cones or cups for a classic presentation. For a touch of elegance, serve the ice cream with a sprig of fresh mint or a few whole strawberries on top.
If you want to go the extra mile, consider making an ice cream sandwich with freshly baked cookies or using your ice cream to fill homemade pastries. These creative presentations will not only look appealing but also add a delightful twist to your dessert.
Pairing with Fresh Fruits, Sauces, or Toppings
To elevate your Strawberry Vanilla Bean Dream Ice Cream, consider pairing it with fresh fruits, sauces, or toppings. Fresh sliced strawberries or a handful of blueberries can add a burst of flavor and texture. Drizzling warm chocolate sauce or a homemade strawberry coulis over the ice cream can enhance its sweetness and visual appeal.
You can also sprinkle crushed nuts or granola on top for added crunch. For those who enjoy a decadent treat, a dollop of whipped cream or a sprinkle of mini chocolate chips can take your dessert to the next level.
Ideas for Creating a Sundae or Dessert Bar at Home
For a fun twist, why not create a sundae or dessert bar at home? Set up a station with your Strawberry Vanilla Bean Dream Ice Cream as the star and offer an array of toppings for guests to customize their sundaes. Include options like caramel sauce, hot fudge, sprinkles, crushed cookies, and various fruits. This interactive experience is perfect for parties, family gatherings, or a cozy night in.
Nutritional Information
While homemade ice cream is undoubtedly a treat, it’s essential to be aware of the nutritional aspects. For a standard serving size of approximately half a cup of Strawberry Vanilla Bean Dream Ice Cream, you can expect the following nutritional information:
– Calories: Approximately 150-200 calories
– Total Fat: 8-10 grams
– Saturated Fat: 5-6 grams
– Cholesterol: 30-50 mg
– Sodium: 30-50 mg
– Total Carbohydrates: 20-25 grams
– Sugars: 15-20 grams
– Protein: 2-3 grams
Discussion on Portion Control and Balance in a Dessert
While it’s easy to indulge in homemade ice cream, practicing portion control can help maintain a balanced diet. Consider serving smaller portions paired with fruit or nuts to create a more satisfying dessert experience without overindulging. Ice cream can be enjoyed in moderation as part of a well-rounded diet, and the satisfaction of making it from scratch adds even more value to your treat.
Conclusion
Creating your own Strawberry Vanilla Bean Dream Ice Cream is not just about enjoying a delicious treat; it’s about the joy of crafting something special with your own hands. From the delightful churning process to the anticipation of that final freeze, each step is a journey filled with flavor and creativity.
Don’t hesitate to experiment with variations in the future. Try incorporating different fruits like raspberries, peaches, or even chocolate swirls to create new flavors. The satisfaction of enjoying homemade ice cream far exceeds that of store-bought options, as you can customize each batch to your liking.
So roll up your sleeves, gather your ingredients, and embark on your own ice cream-making adventure. Whether enjoyed on a hot summer day or as an indulgent treat any time of year, your homemade Strawberry Vanilla Bean Dream Ice Cream is sure to delight you and those you share it with.