
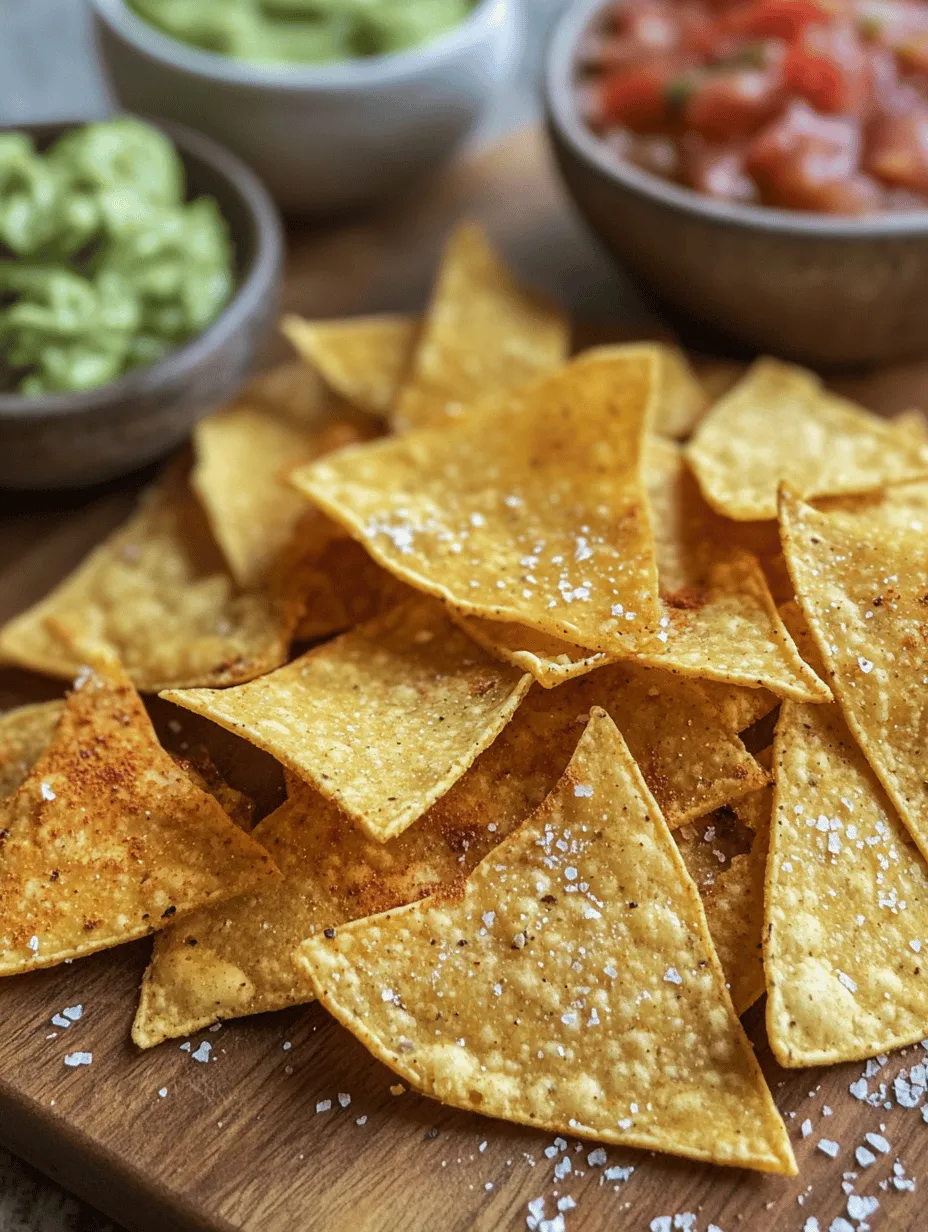
In recent years, the health-conscious trend has taken the culinary world by storm, leading many snack enthusiasts to seek out healthier alternatives to their favorite munchies. With a growing awareness of what goes into our food, more people are opting for homemade snacks that not only satisfy cravings but also contribute positively to their overall well-being. One such delightful option is the Healthy Crunchy Tortilla Chips, a simple, wholesome recipe that brings together taste and nutrition in a delightful crunch.
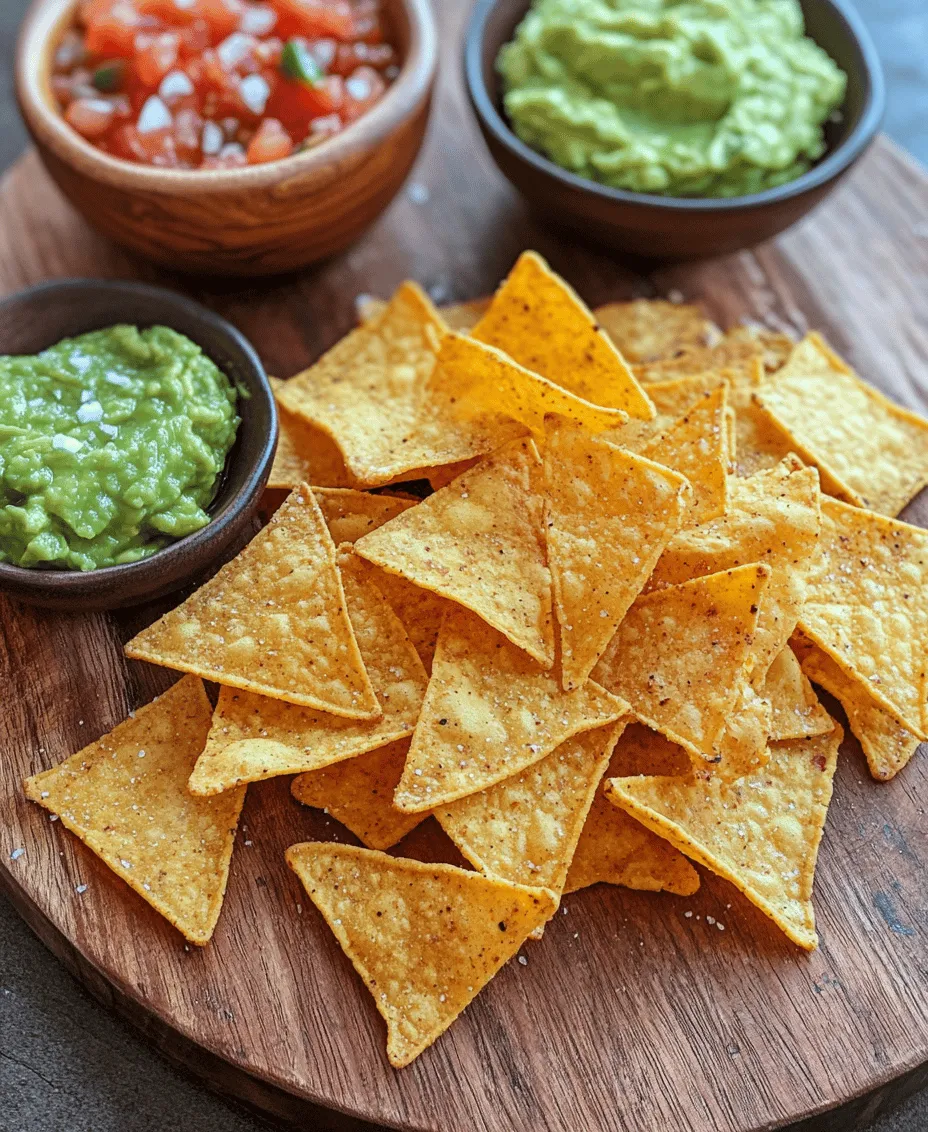
These homemade tortilla chips are not just a treat for the taste buds; they are also incredibly versatile, making them perfect for a variety of occasions. Whether you’re hosting a game night, enjoying a casual movie marathon, or looking for a healthy snack to accompany your lunch, these chips can elevate any meal. With endless pairing possibilities—from fresh salsa and guacamole to creamy dips and vibrant salads—these chips will quickly become a staple in your kitchen.
The Benefits of Making Your Own Tortilla Chips
Healthier Alternative to Store-Bought Chips
One of the most significant advantages of making your own tortilla chips is the ability to control the ingredients that go into them. Store-bought chips often contain unhealthy additives, preservatives, and excessive amounts of sodium. By preparing tortilla chips at home, you can ensure that you’re consuming a snack that prioritizes your health without sacrificing flavor.
Lower in Preservatives and Unhealthy Fats
Commercially manufactured chips are frequently fried and loaded with unhealthy fats, which can contribute to various health issues when consumed regularly. In contrast, our Healthy Crunchy Tortilla Chips are baked, significantly reducing the amount of fat while retaining that satisfying crunch that everyone loves. This method not only makes them a healthier option but also preserves the natural flavors of the ingredients.
Customizable Seasoning Options for Dietary Preferences
Another appealing aspect of homemade tortilla chips is the ability to customize the seasonings to match your dietary needs or flavor preferences. Whether you prefer a spicy kick with chili powder, a savory touch with onion powder, or a zesty twist with lime zest, the options are virtually limitless. This customization allows you to cater to specific dietary restrictions or simply experiment with various flavor profiles.
Cost-Effective Kitchen Solution
Making your own tortilla chips can be a cost-effective solution compared to purchasing pre-packaged snacks. Whole wheat tortillas, which form the base of this recipe, are generally inexpensive and can be found in most grocery stores. With a few additional pantry staples and spices, you can create a large batch of chips for a fraction of the cost of store-bought varieties.
Encouraging Mindful Eating Habits
Creating your snacks from scratch encourages a more mindful approach to eating. By being aware of the ingredients and the cooking process, you can foster a deeper appreciation for the food you consume. This mindfulness can lead to healthier eating habits, as you become more conscious of what you’re putting into your body.
Ingredients Overview
To whip up a batch of Healthy Crunchy Tortilla Chips, you will need a few key ingredients, each contributing unique nutritional benefits and flavors.
Whole Wheat Tortillas
The foundation of this recipe is whole wheat tortillas. Unlike their white flour counterparts, whole wheat tortillas are made from whole grains, which means they retain the bran, germ, and endosperm. This process preserves essential nutrients such as fiber, which aids in digestion, promotes satiety, and helps maintain steady blood sugar levels. Whole grains are also associated with a lower risk of heart disease, making them a smart choice for health-conscious snackers.
Olive Oil
Next, we have olive oil, a healthy fat that offers numerous health benefits. Rich in monounsaturated fats, olive oil is known to support heart health and may help reduce inflammation. It also contains antioxidants that can combat oxidative stress in the body. When used in moderation, olive oil enhances the flavor of your tortilla chips while contributing to a crisp texture.
Seasonings
Seasonings play a crucial role in elevating the flavor profile of your tortilla chips. Here are some key seasonings and their benefits:
– Sea Salt: While salt is essential for enhancing flavor, it’s important to use it in moderation. Sea salt contains trace minerals that can benefit your health, but excessive sodium intake is linked to high blood pressure and other health issues. A light sprinkle of sea salt can add just the right amount of flavor without overdoing it.
– Garlic Powder: This seasoning not only adds a delicious flavor but also brings with it several health benefits. Garlic is known for its immune-boosting properties and has been associated with heart health. Garlic powder provides a convenient way to incorporate this flavorful ingredient without the hassle of chopping fresh garlic.
– Smoked Paprika: This spice imparts a unique, smoky flavor to your tortilla chips. Beyond its delicious taste, smoked paprika is rich in vitamins A and E and contains antioxidants that can help combat inflammation. It’s an excellent way to add depth to your chips without extra calories.
– Cumin: Cumin adds an aromatic quality to your chips while also offering digestive benefits. Known for its ability to aid digestion and improve gut health, cumin is a fantastic addition that can enhance the overall flavor profile of your tortilla chips.
– Nutritional Yeast (Optional): For those seeking a cheesy flavor without dairy, nutritional yeast is a fantastic option. Packed with B vitamins, including B12, nutritional yeast can add a savory, cheesy taste to your chips, making them even more appealing to plant-based eaters.
Step-by-Step Preparation Guide
Now that you have an overview of the ingredients and their benefits, let’s dive into the step-by-step preparation guide for making your Healthy Crunchy Tortilla Chips.
Preheating the Oven
The first step in preparing your tortilla chips is to preheat your oven. Setting the right temperature is essential for achieving that perfect crispiness. Aim for 350°F (175°C), which allows the chips to bake evenly without burning. Preheating the oven ensures that your tortilla chips will cook quickly and maintain their desired crunch.
Preparing the Tortillas
Once your oven is preheated, it’s time to prepare the whole wheat tortillas. Start by stacking them and cutting them into triangles. A sharp knife or a pizza cutter works well for this task. Each tortilla can be cut into six to eight wedges, depending on your preferred chip size.
After cutting the tortillas, place them in a large mixing bowl. Drizzle a small amount of olive oil over the wedges, just enough to lightly coat them. Toss the tortillas gently to ensure that each piece is evenly coated with oil. This step is crucial for achieving that delightful crunch and preventing the chips from becoming too dry.
Next, it’s time to add the seasonings. Sprinkle your chosen seasonings over the tortilla wedges—this is where you can get creative! Start with a pinch of sea salt, followed by your desired amounts of garlic powder, smoked paprika, cumin, and nutritional yeast if you’re using it. Toss the wedges again to ensure even distribution of flavors.
Once your tortilla wedges are well-coated, it’s time to arrange them on a baking sheet. To achieve maximum crispiness, lay the wedges in a single layer, making sure they are not overlapping. This allows for even cooking and prevents any chips from steaming rather than baking.
By following these initial steps, you are well on your way to creating a batch of delicious, healthy tortilla chips. In the next section of our article, we will continue with the baking process and explore tips and tricks to ensure your chips turn out perfectly every time. Stay tuned for the final steps to enjoy these satisfying, crunchy snacks that are sure to please your taste buds and nourish your body!
Techniques for Cutting Tortillas into Uniform Triangles for Even Cooking
To create perfectly crunchy tortilla chips, it’s crucial to cut your tortillas into uniform triangles. This ensures that each chip cooks evenly, allowing for consistent texture and flavor. Start with a stack of tortillas—about 6 to 8 is a great amount for a batch.
1. Stacking: Align the tortillas neatly on a cutting board. Stacking more than one at a time can save time but ensure they are not too thick to cut through.
2. Cutting: Using a sharp knife or a pizza cutter, cut each tortilla in half to form two semicircles. Then, take each semicircle and cut it into 3 equal triangular wedges. The goal is to achieve chips that are roughly the same size, approximately 2-3 inches in width at the base.
3. Tip: If you’re using thicker tortillas, consider warming them for a few seconds in the microwave to make them more pliable, which will make cutting easier.
Creating the Seasoning Mixture
The seasoning mixture is what elevates your tortilla chips from ordinary to extraordinary. Here’s a simple yet flavorful mix that you can adjust according to your taste.
1. Basic Seasoning: Combine 1 teaspoon of salt, 1 teaspoon of garlic powder, and 1 teaspoon of paprika in a small bowl. This blend provides a savory backdrop.
2. Extra Flavor: For added zest, consider incorporating ½ teaspoon of onion powder and ½ teaspoon of dried oregano. These spices bring complexity to the flavors.
3. Mix It Up: Whisk the ingredients together thoroughly to ensure that the flavors are evenly distributed. A small whisk or a fork works well for this purpose.
Tips on How to Whisk Ingredients for the Best Flavor Integration
When whisking your seasoning mixture, it’s important to ensure that all ingredients are well blended. Using a bowl that’s wide enough allows better incorporation.
– Technique: Start by combining the dry ingredients first. This prevents clumping and allows for better mixing.
– Whisking Motion: Use a circular motion to ensure that all spices are evenly mixed. Aim to whisk for about 30 seconds, ensuring that there are no lumps and the mix is homogeneous.
Coating the Chips
Now that you have your tortilla triangles and seasoning ready, it’s time to coat the chips for baking.
1. Oil Application: In a large bowl, add your cut tortilla triangles and drizzle with 2 tablespoons of olive oil. Using your hands, gently toss the chips to ensure they are evenly coated. The oil helps the seasoning stick and promotes that golden crunch.
2. Even Coating: Sprinkle the seasoning mixture over the chips gradually, tossing continuously to avoid clumping. The goal is to achieve a light, even coating without making the chips soggy.
Techniques for Even Coating and Avoiding Sogginess
To prevent sogginess, ensure you’re not using too much oil or seasoning.
– Oven Spray: Alternatively, you can use a cooking spray to lightly coat your chips, which can help control the amount of oil more effectively.
– Tossing: The key is to toss the chips gently and frequently as you add the seasoning to ensure every triangle is coated without excess moisture accumulating.
Arranging on the Baking Sheet
Proper arrangement on the baking sheet is crucial for achieving that perfect crunch.
1. Spacing: Line a baking sheet with parchment paper for easy cleanup. Spread the coated tortilla chips in a single layer, making sure there is space between each chip. This allows hot air to circulate, ensuring that they bake evenly.
2. Batch Baking: If you have a lot of chips, consider baking them in batches to avoid overcrowding the pan.
Importance of Spacing for Optimal Baking
Spacing is essential for achieving crispy chips. When chips are too close together, they tend to steam rather than bake, resulting in a flat and chewy texture. Aim for at least an inch of space between each chip.
Baking the Chips
Preheat your oven to 350°F (175°C) and prepare for baking.
1. Visual Cues for Doneness: Bake the chips for about 10-15 minutes, flipping them halfway through. Look for a golden brown color and a crisp texture as signs of doneness.
2. Flipping: At the halfway mark, use a spatula to carefully flip each chip. This ensures that both sides receive equal heat and prevents burning on one side.
Cooling and Serving Suggestions
Once baked, let your chips cool on the baking sheet for about 5 minutes. This cooling time is essential as it allows them to firm up and reach their maximum crunchiness.
– Dips and Sauces: Serve your healthy crunchy tortilla chips with a variety of dips such as guacamole, salsa, or hummus. You can also try a spinach and artichoke dip for a creamy, savory pairing that complements the crunch of the chips.
Nutritional Information
When enjoying your healthy tortilla chips, it’s good to be aware of their nutritional content.
1. Breakdown: Each serving of these homemade tortilla chips (approximately 10-12 chips) contains around 150-200 calories, depending on the amount of oil used. They provide a good source of carbohydrates and can be a healthier alternative to store-bought chips.
2. Comparison: Homemade chips generally contain fewer preservatives and artificial ingredients than store-bought varieties, making them a healthier option. Store-bought chips can often come with higher sodium levels and unhealthy fats.
3. Portion Control: Keep in mind that even healthy snacks can contribute to excess calorie intake if consumed in large quantities. Stick to a serving size of about 10-12 chips to maintain portion control.
Creative Variations on the Recipe
While the basic recipe is delicious, experimenting with different flavors can keep your snack game exciting.
1. Alternative Seasonings: Try using taco seasoning for a zesty kick, or sprinkle some nutritional yeast for a cheesy flavor without dairy.
2. Spicy Options: For those who enjoy heat, adding cayenne pepper or chili powder will spice things up significantly. Start with a small amount and adjust according to your taste preference.
3. Sweet Options: If you’re in the mood for something sweet, consider a sprinkle of cinnamon mixed with a touch of sugar. These can serve as a great dessert-like snack.
4. Different Types of Tortillas: Experimenting with various types of tortillas can also bring new flavors. Corn tortillas provide a traditional taste, while flavored varieties like spinach or sun-dried tomato can add an interesting twist.
5. Pairing Ideas: In addition to traditional salsas, consider pairing your tortilla chips with tzatziki, a fresh avocado dip, or a zesty bean dip for a wholesome snack experience.
Conclusion
Making healthy crunchy tortilla chips at home is not only simple but also rewarding. The advantages of this recipe include the ability to control the ingredients, ensuring a healthier snack option for you and your family.
Experimenting with flavors and seasonings can lead to a delightful array of snacks tailored to your taste, providing a wholesome alternative to store-bought chips. Enjoy the satisfaction of crafting your own crunchy chips, knowing you’re indulging in a treat that everyone will appreciate. So gather your ingredients, unleash your creativity, and savor the joy of homemade tortilla chips that are both crunchy and delicious!