
Introduction
In the world of delicious snacks, few dishes can rival the mouthwatering experience of Crispy Chicken Ranch Wraps. Perfect for a quick lunch, satisfying dinner, or a delightful party appetizer, these wraps combine tender, juicy chicken with fresh vegetables and creamy ranch dressing, all nestled in a soft tortilla. This article will take you through the step-by-step process of creating these wraps, ensuring that you can replicate this flavor-packed dish in your own kitchen.
Crispy Chicken Ranch Wraps are not just a meal; they are a culinary experience that tantalizes the taste buds with every bite. The combination of crispy chicken, fresh greens, and zesty ranch dressing creates a symphony of flavors and textures that is hard to resist. Whether you are hosting a gathering, preparing a family meal, or simply craving a snack, these wraps will be a hit with everyone.
This recipe is highly customizable, allowing you to adjust the ingredients to suit your preferences. The crispy chicken can be spiced up or toned down, and the choice of vegetables can vary based on your taste and what you have on hand. The result is a versatile dish that caters to all ages and palates.
Now, let’s dive into the essential ingredients that come together to create these delightful wraps.
Understanding the Ingredients
Exploring the Essential Components of Crispy Chicken Ranch Wraps
Creating the perfect Crispy Chicken Ranch Wrap begins with understanding the key ingredients that contribute to its flavor and texture. Each component plays a vital role in making these wraps not only delicious but also satisfying.
Overview of Chicken Tenders: Why They Are the Perfect Choice for Wraps
Chicken tenders are the star of this recipe. Their tender, juicy nature makes them ideal for wraps, as they can be easily cooked to perfection and are easy to handle. Chicken tenders are also versatile; they can be seasoned in various ways to complement the other ingredients in the wrap. Whether you prefer them spicy or mild, chicken tenders can be tailored to suit your taste.
The Role of Buttermilk: Tenderizing and Flavor Enhancement
One of the secrets to achieving tender and flavorful chicken is marinating it in buttermilk. Buttermilk not only helps to tenderize the meat but also infuses it with moisture and flavor. The acidity in buttermilk breaks down the proteins in the chicken, resulting in a juicy and succulent bite. Additionally, the tanginess of buttermilk complements the savory spices and ranch dressing, enhancing the overall flavor profile of the wraps.
Flour and Panko Breadcrumbs: Creating That Irresistible Crispy Texture
The breading is crucial for achieving the signature crispy exterior of the chicken tenders. A combination of all-purpose flour and panko breadcrumbs is recommended for the best results. While all-purpose flour provides a base layer of crispiness, panko breadcrumbs add an extra crunch that elevates the dish. Panko breadcrumbs are larger and coarser than traditional breadcrumbs, resulting in a light and airy texture that is simply irresistible.
Spices and Seasonings: Enhancing the Flavor Profile
To take the flavor of the chicken to the next level, a blend of spices and seasonings is essential. Common choices include garlic powder, onion powder, paprika, salt, and pepper. These spices not only enhance the chicken’s natural flavor but also create a delicious seasoning crust when cooked. Feel free to experiment with additional spices, such as cayenne pepper for heat or dried herbs for an aromatic touch.
Fresh Vegetables: Adding Nutrition and Crunch
Fresh vegetables are an integral part of the Crispy Chicken Ranch Wraps. Crisp lettuce, juicy tomatoes, and crunchy cucumbers are popular choices that add color, nutrition, and texture to the wraps. The freshness of the vegetables balances the richness of the chicken and ranch dressing, making each bite refreshing and satisfying. You can also include other vegetables like bell peppers or avocados for added flavor and creaminess.
The Importance of Ranch Dressing: The Creamy Element That Ties It All Together
No Crispy Chicken Ranch Wrap is complete without the creamy ranch dressing. This dressing adds a rich layer of flavor that complements the crispy chicken and fresh vegetables perfectly. The tangy and herbaceous notes of ranch dressing tie all the ingredients together, enhancing the overall experience of the wrap. You can use store-bought ranch dressing or make your own for a personalized touch.
Marinating the Chicken
The Importance of Buttermilk in Chicken Preparation
Now that we’ve explored the essential ingredients, it’s time to dive into the preparation process, starting with marinating the chicken. This step is crucial for achieving the desired tenderness and flavor.
Breakdown of the Marination Process
To marinate the chicken tenders, begin by placing them in a bowl or a resealable plastic bag. Pour enough buttermilk over the chicken to fully submerge it. The buttermilk should be seasoned with a pinch of salt and pepper to enhance the flavor. For an extra kick, consider adding a dash of hot sauce or a sprinkle of your favorite seasoning blend.
Seal the bag or cover the bowl with plastic wrap, and place it in the refrigerator. The chicken should marinate for at least 30 minutes, but for optimal results, aim for 2 to 4 hours. This allows the flavors to penetrate the meat while the buttermilk works its magic in tenderizing the chicken.
How Buttermilk Enhances Flavor and Tenderness
The science behind buttermilk marination lies in its acidity. As the chicken soaks in the buttermilk, the lactic acid helps to break down the proteins, resulting in a more tender texture. Additionally, the flavors from the buttermilk and any added seasonings infuse into the chicken, creating a flavorful base that will shine through in every bite.
Suggested Marination Times for Optimal Results
– Minimum Marination Time: 30 minutes (quick soak for flavor)
– Optimal Marination Time: 2-4 hours (for maximum tenderness and flavor)
– Extended Marination Time: Up to overnight (ensure chicken is covered and refrigerated)
Once marinated, the chicken tenders will be ready for the next step in the cooking process: preparing the breading.
Preparing the Breading
Creating the Perfect Breading Mix for Crispy Chicken
The breading is a crucial component of the Crispy Chicken Ranch Wraps, providing that coveted crunch and texture. Follow these steps to create the perfect breading mix.
Step-by-Step Guide to Preparing the Dry Ingredients
1. Gather Your Ingredients: You will need all-purpose flour, panko breadcrumbs, and your chosen spices.
2. Prepare the Flour Mixture: In a shallow dish, combine about 1 cup of all-purpose flour with a pinch of salt, pepper, garlic powder, and any additional spices you desire. Mix thoroughly to ensure even distribution of the seasonings.
3. Prepare the Panko Mixture: In another shallow dish, add about 1-2 cups of panko breadcrumbs. You can also mix in some grated Parmesan cheese for added flavor and richness.
4. Set Up a Breading Station: Arrange your dishes in a line, starting with the marinated chicken, followed by the flour mixture, then the panko breadcrumbs. This setup will help streamline the breading process.
Tips for Achieving the Right Texture with Panko Breadcrumbs
To achieve the perfect crispy texture, here are some tips to keep in mind:
– Use Fresh Panko: Always use fresh panko breadcrumbs for the best results. If your breadcrumbs are stale, they may not provide the desired crunch.
– Press Firmly: When coating the chicken in panko, make sure to press firmly to ensure the breadcrumbs adhere well. This will create a thicker, crunchier coating once fried or baked.
– Double Breading Option: For an even crispier texture, you can double bread the chicken. After the first coat of panko, dip the chicken back into the buttermilk and then coat it again in the panko breadcrumbs.
Variations on Seasonings for Personalized Flavor
Feel free to get creative with your seasoning blends! Here are some ideas for variations:
– Spicy Kick: Add cayenne pepper or chili powder to the flour mixture for a spicy twist.
– Herb Infusion: Incorporate dried herbs like oregano, thyme, or basil to add an aromatic touch.
– Smoky Flavor: Use smoked paprika in the breading for a delightful smoky flavor.
With the chicken marinated and the breading prepared, it’s time to coat the chicken tenders and get ready for cooking.
Coating the Chicken
The Art of Breading Chicken Tenders
Coating the chicken tenders is a straightforward yet essential step that sets the foundation for that crispy exterior. Follow these steps for perfect results.
1. Remove the Chicken from the Marinade: Take the marinated chicken tenders out of the buttermilk, allowing any excess liquid to drip off.
2. First Coat in Flour: Dredge each chicken tender in the flour mixture, ensuring it is fully coated. Shake off any excess flour to avoid clumping.
3. Dip in Buttermilk Again: For the double-breading option, dip the floured chicken back into the buttermilk for a second layer of moisture.
4. Coat in Panko Breadcrumbs: Finally, roll the chicken in the panko breadcrumbs, pressing firmly to ensure an even coating. Set aside on a plate or wire rack while you prepare to cook.
5. Repeat the Process: Continue this process until all chicken tenders are coated. This method not only maximizes crunchiness but also ensures that each piece is evenly coated for consistent cooking.
Now that your chicken tenders are perfectly breaded, they are ready to be cooked to crispy perfection. In the next part of this article, we will discuss the cooking methods, assembly of the wraps, and tips for serving these delightful snacks. Stay tuned as we continue our journey to create the ultimate Crispy Chicken Ranch Wraps!
Techniques for Properly Coating Chicken for Maximum Crispiness
Achieving the perfect crispy texture on your chicken tenders begins with the right coating technique. Start by patting the chicken tenders dry using paper towels; this removes any excess moisture that could hinder crispiness. Next, set up a breading station with three shallow dishes: one for seasoned flour, one for beaten eggs, and the third for panko breadcrumbs.
When coating the chicken, first dredge each piece in the seasoned flour, ensuring all sides are evenly coated. This step is crucial as it creates a dry surface that helps the egg adhere better. After the flour, dip the chicken into the beaten eggs, allowing any excess to drip off. Finally, press the chicken into the panko breadcrumbs firmly. The goal is to ensure that the breadcrumbs stick well to the chicken, enhancing the crunch factor.
Importance of Shaking Off Excess Flour and Adhering Panko
Shaking off excess flour after dredging is vital. If too much flour remains, it can create a gummy texture when fried, detracting from the desired crispiness. Similarly, pressing the chicken into the panko firmly not only helps the breadcrumbs adhere effectively but also fills in any gaps, leading to a more uniform crust. This attention to detail will reward you with chicken tenders that are perfectly crispy on the outside while remaining juicy on the inside.
Frying the Chicken
Mastering the Frying Technique for Perfectly Crispy Chicken
Frying chicken tenders requires attention to temperature and technique to achieve that golden-brown finish. Start by heating oil in a deep skillet or a frying pan over medium-high heat. The ideal frying temperature is around 350°F (175°C). To test if the oil is ready, drop a small piece of bread into the oil; if it sizzles and turns golden brown in about 60 seconds, the oil is hot enough.
Best Practices for Frying Chicken Tenders
When frying, avoid overcrowding the pan. Place only a few chicken tenders at a time to ensure they fry evenly. If the pan is too crowded, the temperature of the oil will drop, resulting in soggy chicken. Fry the tenders for about 3-4 minutes on each side, or until they reach a deep golden brown and the internal temperature reaches 165°F (74°C).
How to Achieve a Golden-Brown Finish
To achieve that coveted golden-brown finish, watch closely as the tenders fry. Use tongs to flip them carefully, allowing each side to cook evenly. Once cooked, transfer the chicken tenders to a plate lined with paper towels to absorb excess oil, maintaining their crispiness.
Safety Tips for Frying in Oil
Frying can be hazardous, so always prioritize safety. Keep a lid nearby to smother any potential flare-ups and never leave hot oil unattended. Use a thermometer to monitor the oil temperature, and keep a safe distance from the edge of the pan to prevent splatters. Lastly, always let the oil cool completely before disposing of it or cleaning the pan.
Assembling the Wraps
Layering for Maximum Flavor and Texture
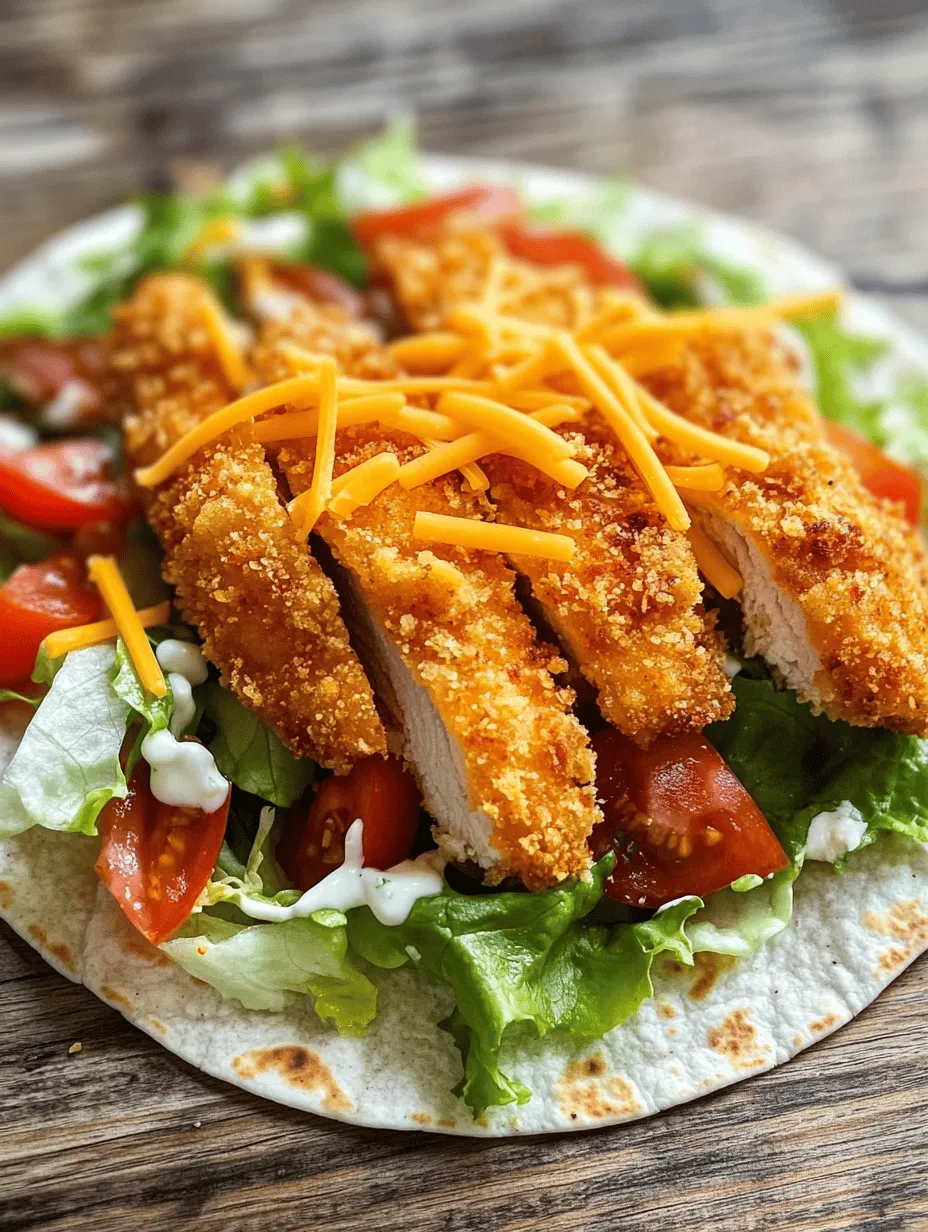
Once your chicken tenders are perfectly fried, it’s time to assemble the wraps. Start with a large tortilla; a flour tortilla works best due to its flexibility. Lay it flat on a clean surface. Begin layering with a generous spread of ranch dressing—this not only adds flavor but also acts as a glue to hold the ingredients together.
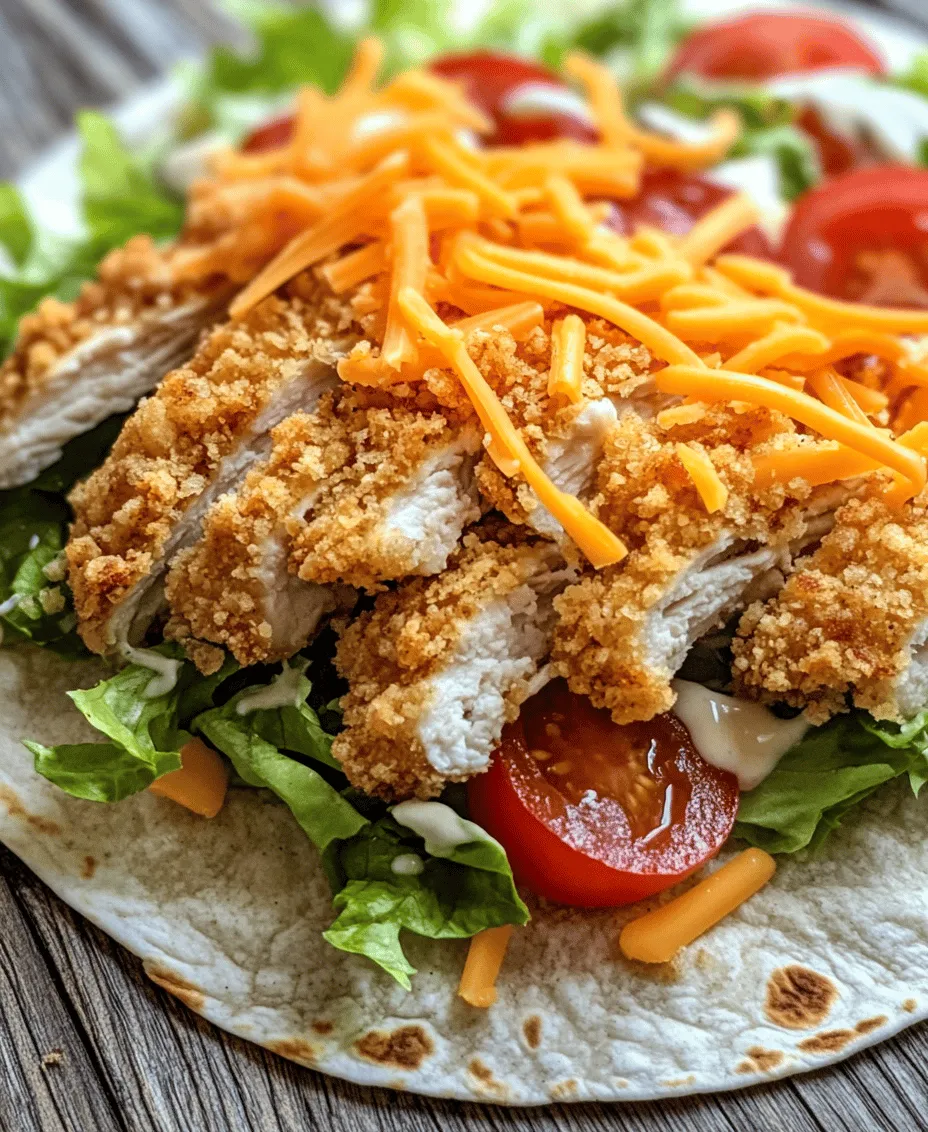
Next, add a handful of fresh greens, such as romaine lettuce or spinach, followed by sliced tomatoes and cucumbers for freshness. Then, place your crispy chicken tenders on top. The layers should be balanced; you want each bite to be a harmonious mix of crisp chicken, crunchy veggies, and creamy ranch.
Suggestions for Customizing Fillings Based on Personal Preference
The beauty of the chicken ranch wrap lies in its versatility. Feel free to customize the fillings based on your preferences. Consider adding shredded cheese, such as cheddar or pepper jack, for an extra creamy texture, or avocado slices for a rich, buttery flavor. You can also incorporate sautéed peppers or onions for added depth. Don’t hesitate to experiment with different dressings or sauces beyond ranch; barbecue sauce or a spicy aioli could elevate the flavor profile even further.
The Role of Ranch Dressing in Flavor Balance
Ranch dressing plays a pivotal role in balancing the flavors in your wraps. Its creamy texture complements the crunchy chicken, while the herbs and spices add a burst of flavor that ties the ingredients together. For those who enjoy a bit of heat, consider mixing in some hot sauce or using a spicy ranch dressing for an added kick.
Wrapping It Up
Techniques for Creating a Neat and Delicious Wrap
To create a neat and delicious wrap, start by folding in the sides of the tortilla over the fillings. This prevents any ingredients from spilling out while you roll. Begin rolling the tortilla tightly from the bottom, ensuring that the fillings are securely tucked in. Continue rolling until the entire wrap is closed. If desired, you can place the seam side down to help it hold its shape.
Tips for Ensuring the Wrap Holds Together Without Falling Apart
To ensure your wrap holds together, consider using a toothpick to secure it after rolling. Additionally, wrapping the assembled wrap in parchment paper can help maintain its shape and keep everything together, especially if you’re preparing them for a picnic or meal prep. If the wraps are made in advance, store them in an airtight container in the refrigerator to keep them fresh.
Serving Suggestions
Best Practices for Serving Crispy Chicken Ranch Wraps
When serving crispy chicken ranch wraps, presentation is key. Cut the wraps in half diagonally and place them on a serving platter. This not only makes them easier to handle but also showcases the colorful layers inside.
Ideas for Dipping Sauces and Side Dishes
Pair your wraps with a variety of dipping sauces for added flavor. Consider serving with extra ranch dressing, spicy sriracha, or a zesty lemon-garlic aioli. For side dishes, fresh fruit salad, crispy potato wedges, or a simple coleslaw can complement the wraps beautifully.
Creative Plating Ideas for Gatherings and Parties
For gatherings and parties, elevate your presentation by arranging the wraps on a wooden board or tiered serving platter. Garnish with fresh herbs, such as cilantro or parsley, to add a pop of color. You can also provide a selection of dipping sauces in small bowls for a fun and interactive dining experience.
Conclusion
Crispy Chicken Ranch Wraps offer a delightful combination of flavors and textures that are sure to please any crowd. Whether you’re making them for a casual family meal or a festive gathering, this recipe provides a simple yet satisfying way to enjoy a beloved snack. With easy-to-follow steps and accessible ingredients, you can create a dish that highlights the joy of cooking while delivering a delicious treat that everyone will love.
By mastering the techniques outlined in this recipe, you’ll ensure every bite is filled with crunch and flavor. So gather your ingredients, fire up that frying pan, and get ready to enjoy these mouthwatering wraps that will undoubtedly become a go-to recipe in your household.