
Introduction
The Black Forest Cake, or Schwarzwälder Kirschtorte as it’s known in German, is a rich and indulgent dessert that has captivated the hearts of dessert lovers around the world. Originating from the Black Forest region of Germany, this cake has become a staple in confectionery culture, often gracing the tables of celebrations, birthdays, and special occasions. The cake’s name is derived from the region itself, known for its dark, dense forests and the production of sour cherries, which play a pivotal role in this dessert’s unique flavor profile.
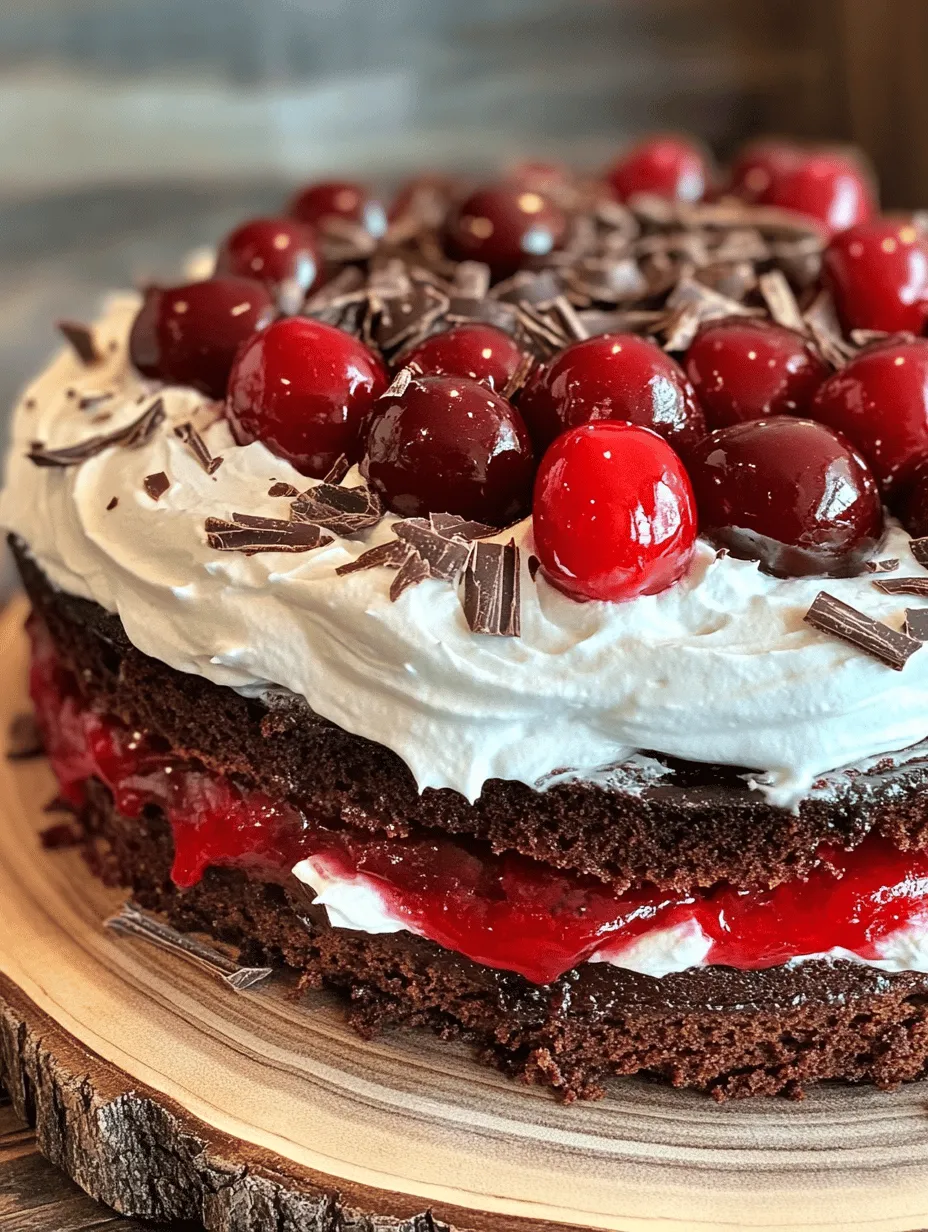
At its core, the Black Forest Cake is a delightful combination of moist chocolate cake, luscious cherry filling, and fluffy whipped cream. The contrast between the rich chocolate and the tartness of the cherries creates an irresistible balance that leaves a lasting impression on anyone who takes a slice. Beyond its taste, the cake is a visual masterpiece, showcasing layers of dark chocolate adorned with bright red cherries and creamy white frosting. The Black Forest Cake is not just a dessert; it’s an experience that brings people together, celebrating life’s sweet moments.
In the world of baking, there is something truly special about creating desserts from scratch. Homemade treats, like the Black Forest Cake, offer a personal touch that store-bought options simply cannot replicate. The act of mixing ingredients, watching the cake rise in the oven, and finally assembling the layers is a rewarding journey that culminates in a delicious masterpiece. Baking at home also allows you to customize the flavors and ingredients to suit your preferences, making each cake a unique reflection of your culinary style.
The Allure of Black Forest Cake
What makes the Black Forest Cake so alluring? It’s the harmonious blend of flavors that sets it apart. The rich, velvety chocolate cake serves as the perfect base, providing a deep cocoa flavor that is both comforting and decadent. The tart cherries, often layered between the chocolate, add a refreshing contrast that cuts through the richness, creating a balanced taste that dances on the palate. Topping it all off is a generous dollop of whipped cream, which lends a light and airy texture, rounding out the flavor profile and making each bite a delightful experience.
Visually, the Black Forest Cake is a showstopper. The deep brown of the chocolate layers contrasts beautifully with the vibrant red of the cherries and the snowy white of the whipped cream. This striking appearance makes it a popular choice for celebrations, where it often takes center stage on dessert tables. Whether it’s a birthday party, wedding, or holiday gathering, the Black Forest Cake’s beauty and flavor ensure that it is always a crowd-pleaser.
The popularity of the Black Forest Cake has a rich historical context. It is believed that the cake was inspired by the traditional German dessert known as “Schwarzwälder Kirschwasser,” a cherry schnapps that hails from the Black Forest region. The combination of chocolate, cherries, and cream has transformed over the years, evolving into the beloved cake we know today. Personal stories about the cake often highlight its role in family gatherings, where recipes are passed down through generations, each adding their twist to the classic version. These tales of love and tradition only enhance the cake’s charm, making it a cherished recipe in many households.
Ingredients Breakdown
To create a truly decadent Black Forest Cake, it’s essential to understand the role of each ingredient involved. This cake comprises several key components, each contributing to the final product’s taste and texture.
All-Purpose Flour
All-purpose flour is the backbone of the cake, providing structure and stability. It forms the foundation that holds the layers together, ensuring that the cake has the right texture. When measuring flour, it’s important to avoid packing it into the measuring cup, as this can lead to a dense cake. Instead, use a spoon to lightly fill the cup and level it off with a knife for accuracy.
Granulated Sugar
Granulated sugar not only sweetens the cake but also plays a crucial role in moisture retention. It helps create a tender crumb by dissolving into the batter, which allows for a softer texture. Sugar also enhances the cake’s flavor, balancing the richness of the chocolate and the tartness of the cherries.
Unsweetened Cocoa Powder
Unsweetened cocoa powder is what gives the Black Forest Cake its deep chocolate flavor. It adds a rich and intense cocoa essence that elevates the cake from ordinary to extraordinary. Opt for high-quality cocoa powder for the best flavor, as it significantly impacts the overall taste of the cake.
Baking Powder and Baking Soda
These leavening agents are essential for achieving the perfect rise in the cake. Baking powder provides a quick lift, while baking soda reacts with the acidity in the buttermilk or vinegar to create bubbles that help the cake rise. Together, they ensure the cake is light and fluffy, rather than dense and heavy.
Eggs and Milk
Eggs act as binding agents, helping to hold the cake together while providing moisture and richness. The proteins in the eggs contribute to the cake’s structure. Milk adds additional moisture, helping to create a tender crumb. Using room temperature eggs and milk is crucial, as this allows for better incorporation into the batter and helps create an even texture.
Vegetable Oil
Vegetable oil is used in the cake to ensure it remains moist and tender. Unlike butter, which can solidify when cooled, oil keeps the cake soft and prevents it from drying out. This is especially important for a cake that is meant to be decadent and indulgent.
Vanilla Extract
A splash of vanilla extract enhances the overall flavor of the cake, adding a subtle warmth that complements the chocolate and cherries. It’s a simple yet powerful ingredient that elevates the taste profile of the dessert.
Cherry Filling Ingredients
The cherry filling is a critical component of the Black Forest Cake, as it adds a burst of flavor and a juicy texture that contrasts beautifully with the chocolate layers. Typically made from sour cherries, sugar, cornstarch, and a splash of Kirsch (cherry schnapps), this filling balances the richness of the cake with its tartness. The cherries can be fresh, frozen, or jarred, depending on availability and preference.
Whipped Cream
Finally, the whipped cream serves as a light, fluffy topping that brings the entire cake together. It not only adds a creamy texture but also enhances the visual appeal. The sweetness of the whipped cream complements the tart cherry filling and rich chocolate layers, creating a harmonious dessert experience.
Preparing the Chocolate Cake
Now that we’ve explored the ingredients, let’s dive into the steps for preparing the chocolate cake—a crucial element of the Black Forest Cake. Follow these detailed instructions for achieving the perfect chocolate cake that forms the foundation of this decadent dessert.
Step 1: Gather Your Ingredients
Before you start, ensure you have all your ingredients measured and ready to go. This will streamline the process and make it easier to follow the recipe. Be sure to use room temperature eggs and milk, as this helps with better mixing and a more even bake.
Step 2: Preheat Your Oven
Preheat your oven to 350°F (175°C). This ensures that the cake bakes evenly from the moment you place it in the oven. While the oven heats, you can prepare your cake pans.
Step 3: Prepare Your Cake Pans
Grease and flour two 9-inch round cake pans to prevent sticking. You can also line the bottoms with parchment paper for added assurance. Properly preparing the pans is essential for easy removal once the cakes are baked.
Step 4: Mix Dry Ingredients
In a large mixing bowl, sift together the all-purpose flour, granulated sugar, unsweetened cocoa powder, baking powder, baking soda, and a pinch of salt. Sifting the dry ingredients helps to aerate them, ensuring that there are no lumps and that everything is well combined.
Step 5: Combine Wet Ingredients
In a separate bowl, whisk together the eggs, milk, vegetable oil, and vanilla extract until well combined. This mixture should be smooth and homogenous, with no visible lumps.
Step 6: Combine Wet and Dry Ingredients
Gradually add the wet ingredients to the dry ingredients, mixing gently with a spatula or a hand mixer on low speed. Be careful not to overmix, as this can lead to a dense cake. Mix just until the ingredients are incorporated, and the batter is smooth.
Step 7: Check the Consistency
The batter should be thick but pourable. If it seems too thick, you can add a few tablespoons of milk to achieve the desired consistency.
Step 8: Pour into Cake Pans
Divide the batter evenly between the prepared cake pans. Use a spatula to smooth the tops, ensuring an even bake.
Step 9: Bake
Place the cake pans in the preheated oven and bake for 25-30 minutes, or until a toothpick inserted into the center comes out clean. Keep an eye on the cakes to prevent overbaking, as this can lead to a dry texture.
Step 10: Cooling Techniques
Once baked, remove the cakes from the oven and let them cool in the pans for about 10 minutes. Then, carefully turn them out onto wire racks to cool completely. This step is crucial, as it prevents the cakes from becoming soggy and allows them to retain their shape.
By following these steps, you will create a beautifully moist and flavorful chocolate cake that is the heart of the Black Forest Cake. In the next part of this article, we will explore how to create the cherry filling that adds a delightful burst of flavor and the whipped cream that tops this decadent dessert. Stay tuned for the next delicious steps in crafting your homemade Black Forest Cake!
Decadent Homemade Black Forest Cake
Making the Cherry Filling
To create the quintessential cherry filling for your Black Forest Cake, you’ll want to start with high-quality cherries. The classic choice is Morello cherries, known for their tartness and rich flavor. However, if you can’t find them, alternatives such as frozen sour cherries or even fresh tart cherries can work perfectly.
1. Prepare the Cherries: If using fresh cherries, pit and slice them. For frozen cherries, allow them to thaw and drain excess liquid.
2. Cooking the Filling: In a medium saucepan over medium heat, combine the cherries with sugar (adjust based on your sweetness preference), a splash of vanilla extract, and a bit of cherry juice or water. Bring this mixture to a gentle simmer, stirring occasionally.
3. Thickening the Filling: To achieve that perfect, luscious filling, you will need a thickening agent. Cornstarch is an excellent choice for this purpose. In a small bowl, mix about 1-2 tablespoons of cornstarch with an equal amount of cold water to create a slurry. Slowly pour this mixture into the cherry mixture while stirring constantly. Continue to cook until the filling thickens and becomes glossy, about 2-3 minutes.
4. Adjusting Sweetness: Taste your filling and adjust the sweetness as desired. If you want to deepen the flavor, consider adding a tablespoon or two of cherry liqueur, such as Kirsch. This will not only enhance the cherry flavor but also add a delightful complexity to your filling.
5. Alternative Options: If cherries aren’t your favorite, feel free to experiment with other fruits such as raspberries, strawberries, or blueberries. Each will bring its own unique flavor profile to the cake.
Whipping the Cream to Perfection
Whipped cream is a crucial component of the Black Forest Cake, providing a light and airy texture that beautifully complements the rich chocolate and cherry flavors.
1. Choosing Equipment: The right bowl and equipment can make all the difference when whipping cream. Use a large, chilled stainless steel or glass bowl. If you have a stand mixer, that can be a time-saver, but you can achieve great results with a hand mixer or a whisk if you prefer a more manual approach.
2. Understanding Peaks: It’s essential to know the difference between soft peaks and stiff peaks. Soft peaks form when the cream is whipped just enough to hold its shape but still droops slightly when the beaters are lifted. Stiff peaks occur when the cream is whipped until it stands tall and firm. For Black Forest Cake, stiff peaks are ideal, as they hold their shape well between cake layers.
3. Flavoring Whipped Cream: To elevate your whipped cream, consider adding a touch of powdered sugar or flavored extracts like vanilla or almond. To prevent your whipped cream from weeping (the separation of liquid from the cream), you can add a tablespoon of cornstarch or gelatin dissolved in warm water before whipping.
Assembling the Cake
Assembling your Black Forest Cake is a delightful process that allows your creativity to shine. Here’s a step-by-step guide to ensure your cake is both stable and visually appealing.
1. Leveling Cake Layers: Once your chocolate cake layers have cooled completely, use a serrated knife to level the tops if they have domed. This ensures that your cake layers will stack evenly, providing stability and making it easier to frost.
2. Brushing with Cherry Juice: To enhance the flavor and moisture of your cake, brush each layer with cherry juice or a simple syrup made from sugar and water. This step infuses the cake with additional cherry flavor and keeps it moist.
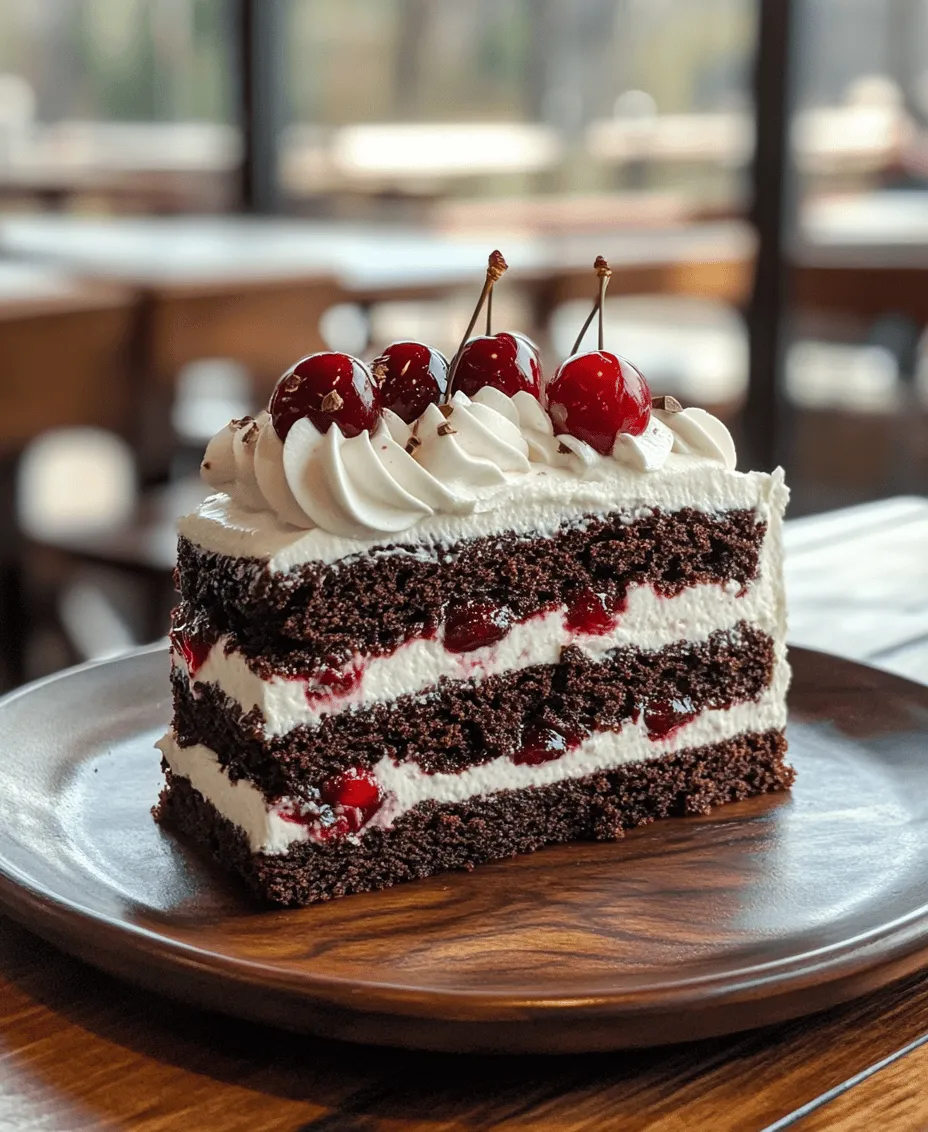
3. Layering the Cake: Begin by placing one layer of chocolate cake on a serving plate or cake stand. Spread a generous layer of the cherry filling over the cake, followed by a layer of whipped cream. Repeat this process with the second layer, then top it with the final layer of chocolate cake.
4. Decorating the Cake: For the final touch, spread a thin layer of whipped cream over the entire cake to create a ‘crumb coat.’ This layer will help catch any crumbs and provide a smooth base for the final decoration. After chilling the cake in the refrigerator for about 30 minutes, apply a thicker layer of whipped cream on top and around the sides. For a polished look, use a spatula to create swirls or peaks in the cream.
5. Finishing Touches: Garnish the top with chocolate shavings, fresh cherries, or even chocolate curls for an elegant presentation. You may also dust the top with powdered sugar for a snowy effect.
Chilling and Serving the Cake
Chilling your Black Forest Cake is essential for the flavors to meld beautifully. Here are some tips for chilling and serving your cake.
1. Why Chilling Matters: Allowing the cake to chill for at least 2 hours (or overnight) helps the whipped cream set and melds the flavors together. It also makes slicing the cake much easier.
2. Slicing and Serving: When ready to serve, use a sharp knife to slice the cake. For cleaner cuts, dip the knife in warm water and wipe it dry before slicing. This method prevents the cream from smearing on the knife and helps maintain the cake’s structure.
3. Garnishing Ideas: Consider serving slices with a dollop of whipped cream, a drizzle of chocolate sauce, or a few fresh cherries. These touches not only enhance the presentation but also elevate the overall dessert experience.
Variations and Personalization
One of the best aspects of baking is the opportunity to personalize recipes to suit your taste. Here are some ideas to customize your Black Forest Cake.
1. Fruit and Filling Alternatives: While cherries are traditional, you can switch things up by using raspberries, strawberries, or even a mix of berries for a fruity twist. Each fruit will impart a different flavor, creating a unique version of this classic dessert.
2. Dietary Alternatives: For those with dietary restrictions, consider making a gluten-free or dairy-free Black Forest Cake. Substitute regular flour with gluten-free all-purpose flour and use coconut cream or dairy-free whipped topping in place of traditional cream.
3. Creative Serving Suggestions: Pair your cake with beverages that complement its flavors. A rich coffee, a fruity red wine, or even a scoop of vanilla ice cream can enhance the dessert.
Conclusion
Creating a decadent homemade Black Forest Cake is not just about following a recipe; it’s about embracing the joy of baking and the satisfaction that comes from sharing a delicious dessert with loved ones. The layers of rich chocolate cake, tart cherry filling, and fluffy whipped cream come together to create a delightful balance of flavors and textures.
As you embark on this baking journey, take pride in the process and don’t hesitate to make the recipe your own. Whether you stick to the classic version or explore variations, the end result will be a stunning cake that delights the senses and brings smiles to those who enjoy it.
So, roll up your sleeves, gather your ingredients, and dive into the wonderful world of baking. You’ll find that the joy of making a Black Forest Cake is just as sweet as enjoying a slice of it.