
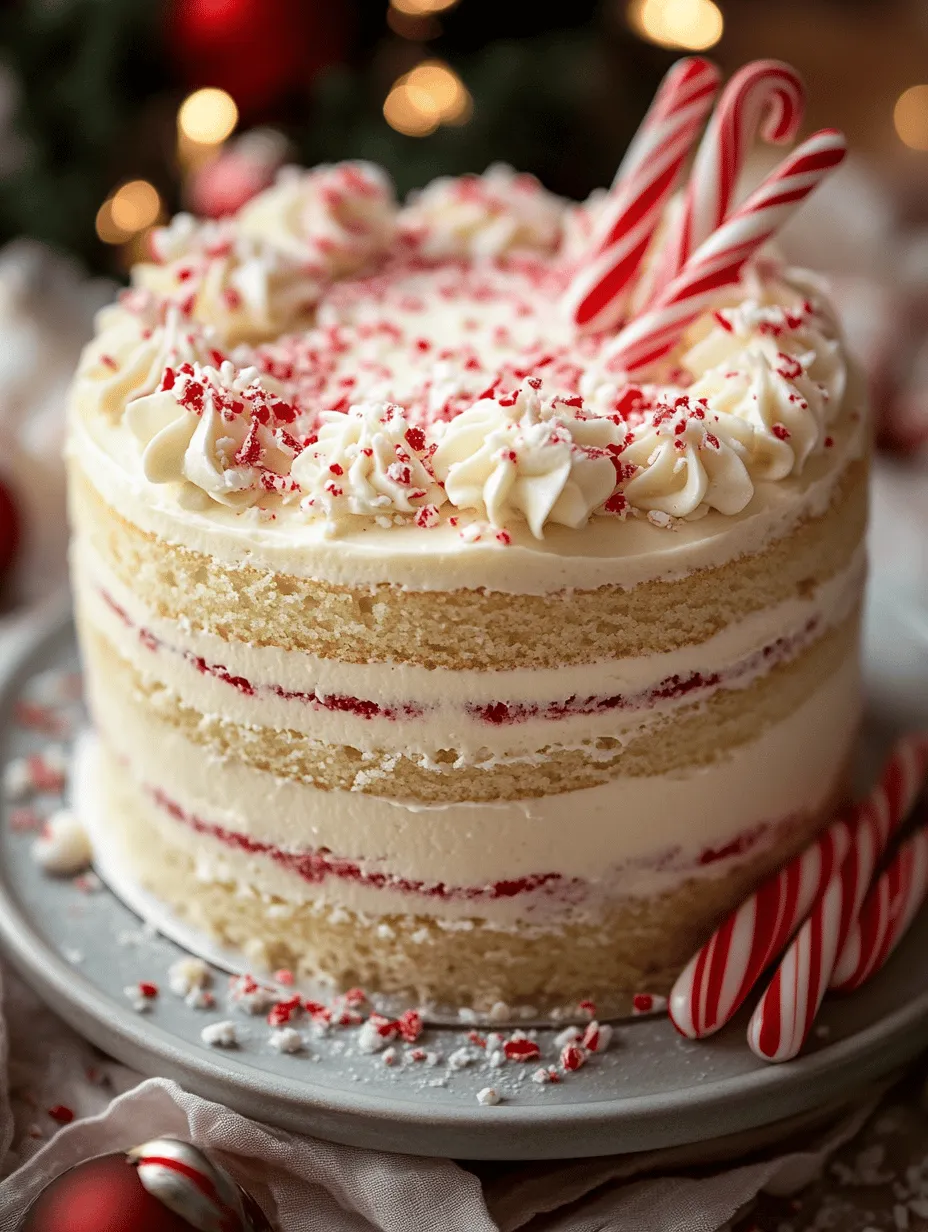
The holiday season is a time for celebration, joy, and, of course, indulgent desserts that bring warmth and cheer to family gatherings and festive parties. One dessert that perfectly embodies the spirit of the season is the White Chocolate Candy Cane Dream Cake. This gorgeous cake is not only a feast for the eyes but also a delightful treat for the taste buds, combining the creamy richness of white chocolate with the refreshing zing of peppermint. Whether you’re looking to impress guests at a holiday dinner or simply want to treat yourself, this cake promises to be a showstopper.
As the holidays approach, the importance of festive desserts cannot be overstated. They evoke nostalgia and create lasting memories, making them an essential part of the celebrations. The White Chocolate Candy Cane Dream Cake stands out among typical holiday desserts, bringing a unique twist with its harmonious blend of flavors and textures. It’s a cake that speaks to the heart of the season while offering a modern take on traditional treats.
The allure of combining white chocolate and peppermint flavors is undeniable. White chocolate, with its creamy, buttery notes, provides a luxurious base that pairs beautifully with the cool, crisp essence of peppermint. This combination not only tantalizes the palate but also evokes the quintessential flavors of the holidays, making it a perfect choice for festive gatherings. So, let’s dive into the heart of this recipe and explore the key ingredients that contribute to this cake’s irresistible charm.
Understanding the Ingredients
Every great cake begins with quality ingredients, and the White Chocolate Candy Cane Dream Cake is no exception. Each ingredient plays a crucial role in developing the flavor and texture that makes this cake a standout choice for holiday celebrations.
Flour: The Foundation of the Cake
Flour is the backbone of any cake. For this recipe, all-purpose flour is preferred because it strikes the right balance between structure and tenderness. It provides the necessary gluten that helps the cake rise, giving it a light and airy texture.
Sugars: Enhancing Sweetness and Moisture
In this cake, both granulated sugar and brown sugar are used, each adding its unique characteristics. Granulated sugar sweetens the batter, while brown sugar contributes moisture and a subtle hint of caramel flavor. The combination ensures that the cake remains moist and decadent, making every bite a delight.
Eggs: Binding and Leavening Agent
Eggs are essential in cake-making as they serve multiple purposes. They bind the ingredients together and provide structure, while also acting as a leavening agent, helping the cake rise. For this recipe, large eggs are recommended to ensure the right amount of moisture and richness.
White Chocolate: Creamy Flavor and Richness
White chocolate is the star of this cake, lending a rich, creamy flavor that complements the peppermint perfectly. When melted and incorporated into the batter, it adds a level of sophistication and indulgence that elevates the cake from ordinary to extraordinary. It’s essential to use high-quality white chocolate, as it makes a significant difference in taste and texture.
Peppermint: Holiday Essence and Aroma
Peppermint is what truly transforms this cake into a holiday treat. The addition of peppermint extract or crushed candy canes infuses the batter with a refreshing aroma and a burst of flavor that is both nostalgic and festive. The classic pairing of white chocolate and peppermint creates a delightful contrast that is sure to please any palate.
Importance of Using High-Quality Ingredients
When it comes to baking, the quality of the ingredients can make or break a recipe. Using high-quality flour, sugars, eggs, and chocolate ensures that your cake has the best flavor and texture possible. Additionally, fresh peppermint enhances the overall taste, making your White Chocolate Candy Cane Dream Cake a memorable centerpiece for any holiday celebration.
Step-by-Step Guide to Making the White Chocolate Candy Cane Dream Cake
Now that we’ve explored the key ingredients, let’s move on to the preparation of this delectable cake. Following a systematic approach will help you achieve the best results and ensure that your cake is both beautiful and delicious.
Preparing for Baking
Before you even think about mixing your ingredients, it’s crucial to prepare your workspace. Start by preheating your oven to 350°F (175°C). An accurate oven temperature is vital for the cake’s success, as it affects how well the cake rises and bakes evenly.
Next, prepare your cake pans. For this recipe, you will need two 9-inch round cake pans. Greasing and flouring your pans properly is essential to prevent the cake from sticking. Use a non-stick baking spray for convenience or apply a thin layer of butter followed by a dusting of flour, making sure to cover the entire surface. This will help your cakes release smoothly once baked, ensuring a perfect presentation.
Mixing the Cake Batter
With your pans prepped and the oven warmed, it’s time to mix the cake batter. Begin by creaming together the softened butter and both types of sugar in a large mixing bowl. Using an electric mixer, beat the mixture on medium speed until it becomes light and fluffy. This process incorporates air into the batter, contributing to the cake’s rise and texture.
Once the butter and sugar are well combined, add the eggs one at a time, mixing thoroughly after each addition. This helps to ensure that the eggs are fully incorporated, resulting in a smoother batter.
Next, it’s time to incorporate the dry ingredients. In a separate bowl, whisk together the all-purpose flour, baking powder, and a pinch of salt. Gradually add the dry mixture to the creamed butter and sugar, alternating with the buttermilk (or milk) to maintain a smooth consistency. Start and end with the dry ingredients, mixing just until combined after each addition. Overmixing can lead to a dense cake, so be gentle during this step.
Tips for Folding in Melted Chocolate
Once the batter is smooth, melt your high-quality white chocolate in a microwave-safe bowl or over a double boiler, stirring until smooth. Allow the melted chocolate to cool slightly before folding it into the batter. It’s crucial to fold the chocolate in gently to maintain the lightness of the batter. Use a spatula to mix until the chocolate is evenly distributed throughout the batter without overworking it.
Baking the Cake
With the batter ready, divide it evenly between the prepared cake pans. Use a spatula to smooth the tops for even baking. Place the pans in the preheated oven, ensuring they are spaced apart to allow for proper air circulation.
The ideal baking time for this cake is around 25 to 30 minutes. However, it’s essential to keep an eye on them as oven temperatures can vary. To check for doneness, insert a toothpick into the center of the cakes; it should come out clean or with a few moist crumbs attached.
Cooling Techniques for Optimal Frosting Application
Once your cakes are baked to perfection, remove them from the oven and let them cool in the pans for about 10 minutes. This allows them to set slightly, making them easier to remove. After the initial cooling, carefully turn the cakes out onto a wire rack to cool completely. This step is crucial, as frosting a warm cake can result in melting and sliding, ruining the beautiful presentation.
Let the cakes cool completely before frosting, ideally for at least an hour. This ensures a stable base for your frosting and allows the cake to retain its structure.
—
This first part of the recipe details the essential background, ingredients, and initial steps of making the White Chocolate Candy Cane Dream Cake, setting the stage for the final assembly and decoration in the upcoming sections. This cake is not just a dessert; it’s a celebration of flavor, texture, and the joyous spirit of the holiday season. So, gather your ingredients and prepare to create a stunning centerpiece that will leave your guests in awe.
Crafting the Frosting: Achieving the Perfect Consistency
The frosting is the crowning glory of the White Chocolate Candy Cane Dream Cake. It not only enhances the cake’s flavor but also adds to its visual appeal. Achieving the perfect frosting consistency is crucial to ensure it spreads smoothly and holds its shape when piped or layered.
Step-by-Step Instructions for Making the Frosting
1. Gather Your Ingredients: For the frosting, you’ll need 1 cup of unsalted butter (softened to room temperature), 4 cups of powdered sugar, 1/4 cup of heavy cream, 1 teaspoon of vanilla extract, and 1 cup of melted white chocolate that has cooled slightly.
2. Mix the Butter: In a large mixing bowl, beat the softened butter with a hand mixer or stand mixer on medium speed until it is light and fluffy (about 3-5 minutes). This process incorporates air into the butter, which is essential for a fluffy frosting.
3. Combine Ingredients: Gradually add the powdered sugar, mixing on low speed initially to prevent a cloud of sugar. Once combined, add the heavy cream and vanilla extract.
4. Incorporate White Chocolate: Slowly drizzle in the melted white chocolate while continuing to mix. Increase the speed to medium-high and beat for an additional 2-3 minutes until the frosting is light, fluffy, and well combined.
5. Adjust Consistency: If your frosting is too thick, add a splash more cream; if it’s too thin, add more powdered sugar until you reach your desired consistency.
Importance of Butter Temperature and Mixing Methods
Using butter at room temperature is essential for a smooth, creamy frosting. Cold butter will not blend well, leading to lumps in your frosting. Mixing methods also matter; start at a low speed to avoid mess and gradually increase speed to combine the ingredients thoroughly. This technique allows for better incorporation of air, which makes the frosting light and fluffy.
Customizing Frosting Consistency to Your Preference
Different occasions might call for different frosting consistencies. For a thicker frosting that holds up well for piping decorations, reduce the amount of cream. Conversely, for a glaze that drips down the sides of the cake, add more cream. Tailoring the frosting to your specific needs allows you to customize your White Chocolate Candy Cane Dream Cake for any celebration.
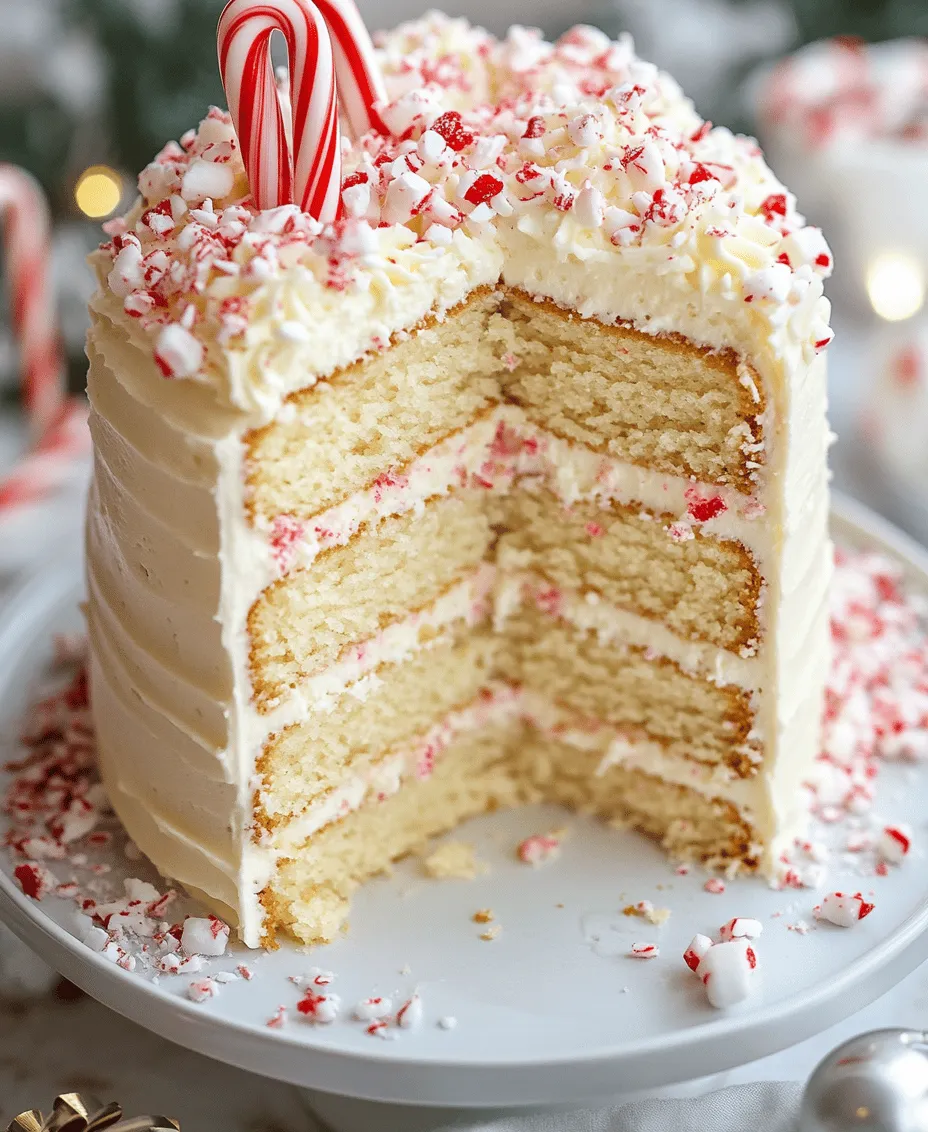
Assembling the Cake: Layering for Maximum Flavor
Once your layers have cooled completely, it’s time to assemble your cake. The layering process is crucial for maximizing flavor and ensuring a beautiful presentation.
Techniques for Even Frosting Application
– Level the Cake Layers: Use a serrated knife to trim the tops of each cake layer if they have domed. This ensures even stacking and a stable cake.
– Use a Turntable: If available, a turntable is invaluable when frosting a cake. It allows you to spin the cake and apply frosting evenly around the sides and top.
– Apply a Crumb Coat: Start by applying a thin layer of frosting (the crumb coat) over the entire cake. This seals in crumbs and creates a smooth base for your final layer of frosting. Chill the cake for about 30 minutes to set this layer.
Tips for Stacking Layers Without Shifting
– Chill Layers: Always chill your cake layers for at least an hour before stacking. Cold layers are less likely to shift and make it easier to apply frosting.
– Use Dowels for Support: If your cake is tall, consider inserting dowels into the bottom layers to provide extra support for the layers above. This will help maintain stability, especially when transporting the cake.
Decorating Your Cake: Creative and Festive Presentation Ideas
The decoration is where your creativity can truly shine. This cake offers a festive canvas perfect for holiday gatherings.
Suggestions for Using Crushed Candy Canes and Shavings
– Candy Cane Crust: After frosting the cake, sprinkle crushed candy canes generously over the top and sides. This not only adds a pop of color but also enhances the minty flavor.
– White Chocolate Shavings: Use a vegetable peeler to create shavings from a bar of white chocolate. These can be strategically placed on top of the frosting to create an elegant look.
Ideas for Additional Festive Garnishes, Including Edible Glitter
– Edible Glitter: A sprinkle of edible glitter will give your cake a dazzling finish, making it perfect for the holiday season.
– Fresh Mint Leaves: Add a few sprigs of fresh mint on top to complement the candy cane flavor and enhance the visual appeal.
Making It Your Own: Variations and Substitutes
The beauty of the White Chocolate Candy Cane Dream Cake lies in its versatility. Here are a few suggestions for personalizing this delightful treat.
Suggestions for Flavor Variations
– Different Extracts: Swap out the vanilla extract for peppermint extract to amplify the mint flavor or use almond extract for a unique twist.
– Chocolate Variations: Instead of white chocolate, try using dark chocolate for a richer flavor. Just remember to adjust the sugar levels, as dark chocolate is less sweet.
Alternatives for Dietary Restrictions
– Gluten-Free Options: Substitute regular flour with a gluten-free all-purpose flour blend. Ensure that all other ingredients are gluten-free as well.
– Dairy-Free Options: Use dairy-free butter and coconut cream instead of heavy cream for the frosting. You can also find dairy-free white chocolate for a complete substitution.
Tips for Personalizing the Cake for Special Occasions
– Themed Decorations: Tailor the decorations to fit the occasion – for example, use colored frosting or themed sprinkles for birthdays or anniversaries.
– Personal Touch: Write a special message on the cake with frosting or use cookie cutters to create festive shapes from fondant or marzipan.
The Perfect Occasion for White Chocolate Candy Cane Dream Cake
The White Chocolate Candy Cane Dream Cake is an ideal dessert for various festive occasions.
Ideal Events to Serve This Cake
– Holiday Parties: Its striking appearance and delicious flavor make it a perfect centerpiece for holiday gatherings.
– Family Gatherings: Share this cake at family reunions or celebrations to create lasting memories around the dessert table.
How This Cake Can Enhance Festive Celebrations
This delightful cake not only tastes amazing but also serves as a conversation starter, bringing people together over a shared love of sweet treats. The festive flavors evoke nostalgia and joy, enhancing the spirit of any celebration.
Creating Memorable Experiences Around Serving the Cake
Consider pairing the cake with a holiday-themed beverage, such as peppermint hot chocolate or spiced cider, to elevate the experience. Sharing stories and laughter while indulging in the cake can create cherished memories for years to come.
Nutritional Information
Understanding the nutritional content of your cake can help in making informed decisions about indulgence, especially during the holiday season.
Breakdown of Key Nutritional Components Per Serving
– Calories: Approximately 450-500 calories per slice, depending on the size and thickness of the frosting.
– Fat: Roughly 25g, primarily from the butter and white chocolate.
– Sugar: About 40g, which is common for desserts but should be enjoyed in moderation.
Discussion on Indulgence and Moderation During the Holidays
While this cake is a delightful treat, it’s essential to enjoy it in moderation. The holidays are a time for celebration, and savoring a slice of this cake can be part of a balanced approach to festive indulgence.
Conclusion
The White Chocolate Candy Cane Dream Cake embodies the joy and festive spirit of the holiday season. Its delicious layers, creamy frosting, and delightful decorations make it a standout dessert for any gathering. As you embark on making this cake, remember to enjoy the process and share the magic of its flavors with family and friends.
This recipe not only invites you to indulge but also encourages you to create lasting memories through shared experiences around the table. So gather your loved ones, whip up this delightful cake, and let it be the centerpiece of your holiday celebrations.