
Introduction
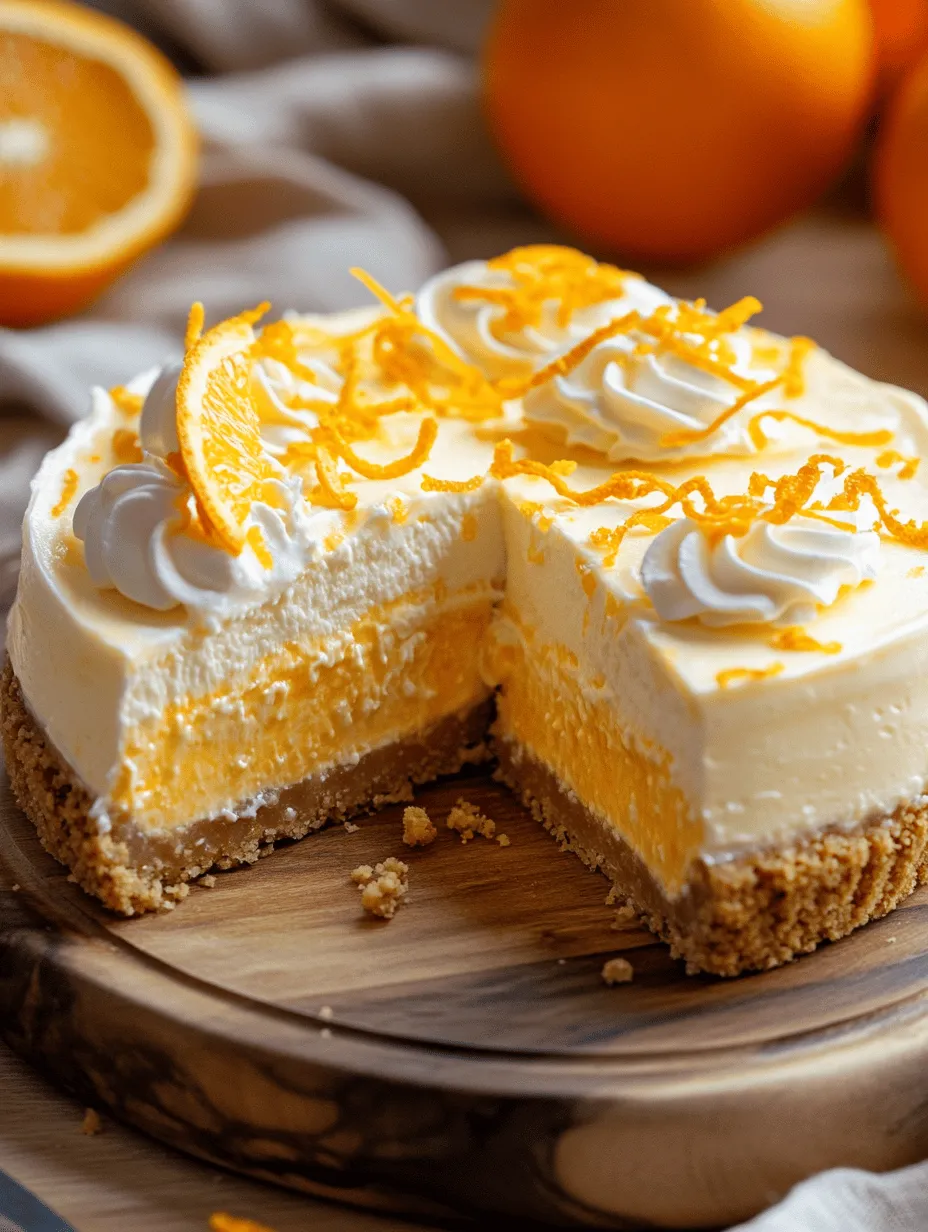
There’s something undeniably nostalgic about the flavors of Orange Creamsicles. The sweet, refreshing combination of orange and cream has been a beloved treat for generations, evoking memories of sunny days, laughter, and carefree moments. As we transition from childhood to adulthood, those delightful flavors still hold a special place in our hearts—and palates. Today, we’re excited to share a recipe that captures the essence of those iconic frozen treats: No-Bake Orange Creamsicle Cheesecake.
As the temperature rises and warm months beckon, the appeal of no-bake desserts becomes even more prominent. They offer a convenient and delightful way to satisfy our sweet cravings without the need for an oven. This No-Bake Orange Creamsicle Cheesecake is not only a breeze to prepare, but it also makes for a perfect addition to quick gatherings, summer picnics, or simply enjoying a slice at home while reminiscing about carefree childhood days.
In this recipe, you can expect a luscious, creamy cheesecake that boasts the vibrant flavors of orange, all atop a crunchy graham cracker crust. We’ll guide you through each step of the process, ensuring that you can create this delightful dessert with ease. So, let’s dive into the ingredients and start crafting your No-Bake Orange Creamsicle Cheesecake!
Understanding the Ingredients
To create a delicious No-Bake Orange Creamsicle Cheesecake, it’s essential to understand the role that each ingredient plays in this recipe. Let’s break down the key components that will come together to make this delightful dessert:
Graham Cracker Crumbs
Graham cracker crumbs form the foundation of our cheesecake crust. Their slightly sweet flavor and crumbly texture provide the perfect contrast to the creamy filling. It’s crucial to use finely crushed graham crackers, as this ensures a smooth, cohesive crust. The crumbs will bind together when mixed with melted butter, creating a sturdy base that holds its shape when sliced.
Unsalted Butter
In most dessert recipes, unsalted butter is the go-to choice, and this cheesecake is no exception. Using unsalted butter allows you to control the overall saltiness of the dish, ensuring that the flavors of the orange and cream shine through without interference. The butter not only adds richness and flavor but also helps to bind the graham cracker crumbs together, resulting in a firm crust that complements the creaminess of the filling.
Cream Cheese
Cream cheese is the star of this cheesecake, serving as the base that provides its signature creaminess and tanginess. For the best results, choose a full-fat cream cheese, as it yields a richer, denser texture that will elevate the overall quality of your cheesecake. Make sure to soften the cream cheese before mixing; this will help it blend seamlessly with the other ingredients, creating a smooth filling without lumps.
Powdered Sugar
Powdered sugar, also known as confectioners’ sugar, is an essential ingredient in our cheesecake filling. Not only does it provide sweetness, but it also contributes to the smooth texture we desire in a no-bake cheesecake. Unlike granulated sugar, powdered sugar dissolves easily, ensuring a silky finish without any graininess. It’s important to sift the powdered sugar before adding it to the mixture to eliminate any clumps and achieve a perfectly smooth filling.
Heavy Whipping Cream
To achieve that light and fluffy texture characteristic of a no-bake cheesecake, heavy whipping cream is a must. When whipped, it incorporates air into the mixture, giving the cheesecake a lightness that balances the denser cream cheese. Heavy whipping cream also adds richness and stability to the filling, ensuring it holds its shape when chilled. For best results, make sure your heavy cream is very cold before whipping, as this will help it reach its peak volume.
Orange Juice and Zest
The star flavors that evoke the essence of summer are undoubtedly the orange juice and zest. Freshly squeezed orange juice provides a bright, tangy sweetness that infuses the cheesecake with its signature flavor. The addition of orange zest amplifies this flavor, adding a burst of citrus aroma that enhances the overall experience. Together, they create a refreshing and vibrant filling that will remind you of those classic creamsicle treats.
Unflavored Gelatin (Optional)
While not a required ingredient, unflavored gelatin can be used to enhance the stability of your cheesecake, especially if you plan to serve it in warm weather. Gelatin helps the filling set more firmly, ensuring that it maintains its shape when sliced. If you prefer a softer texture or are serving the cheesecake in a cooler environment, you can omit the gelatin without compromising the overall flavor.
Step-by-Step Guide to Crafting Your Cheesecake
Now that we’ve unraveled the importance of each ingredient, it’s time to roll up our sleeves and get started on making this delightful No-Bake Orange Creamsicle Cheesecake. Below is a comprehensive guide to preparing this delicious dessert, beginning with the crust.
Preparing the Crust
1. Crush the Graham Crackers: Start by placing your graham crackers in a food processor or a resealable plastic bag. If using a bag, crush the crackers into fine crumbs using a rolling pin. Aim for a texture similar to sand, as this will ensure a solid crust.
2. Mix with Butter: In a mixing bowl, combine the crushed graham crackers with melted unsalted butter. Use a fork to mix them until the crumbs are evenly coated and resemble wet sand. This binding helps the crust hold together once it’s pressed into the pan.
3. Press Firmly into the Pan: Transfer the crumb mixture to a 9-inch springform pan. Using the back of a measuring cup or your fingers, press the mixture firmly and evenly into the bottom and slightly up the sides of the pan. This step is crucial; a well-pressed crust will hold its shape when serving.
4. Chill the Crust: Place the crust in the refrigerator while you prepare the cheesecake filling. Chilling allows the butter to set, giving your crust extra stability.
Soften the Cream Cheese
Before moving onto the filling, it’s vital to ensure your cream cheese is perfectly softened. Cold cream cheese can lead to a lumpy filling, which we want to avoid at all costs.
1. Leave at Room Temperature: Take the cream cheese out of the refrigerator and allow it to sit at room temperature for about 30 minutes. This will soften the cream cheese, making it easier to blend seamlessly into the filling.
2. Cut into Chunks: For quicker softening, cut the cream cheese into smaller chunks. This increases the surface area and helps it soften faster.
Mixing the Filling
Now that our crust is chilling and the cream cheese is softened, we can start mixing our filling.
1. Beat the Cream Cheese: In a large mixing bowl, use an electric mixer to beat the softened cream cheese until it’s creamy and smooth. This should take about 1-2 minutes on medium speed.
2. Add Powdered Sugar: Gradually add the sifted powdered sugar while mixing on low speed. This allows for even incorporation without creating a cloud of powdered sugar. Once combined, increase the speed to medium and mix until fully blended and smooth.
3. Incorporate Heavy Whipping Cream: In a separate bowl, whip the heavy cream until stiff peaks form. This can take about 3-5 minutes with an electric mixer on high speed. Once whipped, gently fold the whipped cream into the cream cheese mixture using a spatula. Be careful not to deflate the whipped cream; this folding technique will ensure your filling remains light and airy.
4. Add Orange Juice and Zest: Gently fold in the freshly squeezed orange juice and orange zest, mixing until just combined. The vibrant flavors of orange will elevate your cheesecake, bringing that nostalgic creamsicle flavor to life.
5. Optional Gelatin Preparation: If you opt to use gelatin for added stability, dissolve the unflavored gelatin in a small amount of warm water according to the package instructions. Allow it to cool slightly before folding it into the filling mixture. Ensure the gelatin is not hot, as this could cause the filling to curdle.
With the filling complete, you’re almost ready to assemble your No-Bake Orange Creamsicle Cheesecake. This creamy, dreamy concoction is bound to impress both family and friends alike. Get ready for the next steps, where we’ll layer this delightful filling into our prepared crust and chill it to perfection. Stay tuned for the final assembly and serving tips in the upcoming sections!
Detailed Instructions for Dissolving Gelatin
To achieve the perfect texture in your No-Bake Orange Creamsicle Cheesecake, proper preparation of the gelatin is crucial. Start by measuring out the gelatin powder according to your recipe’s instructions, typically around 1 tablespoon.
1. Blooming the Gelatin: In a small bowl, combine the gelatin with a few tablespoons of cold water (about 2-3 tablespoons). Stir gently to ensure all the gelatin granules are moistened. Allow it to sit for about 5-10 minutes. This process is known as blooming, and it ensures that the gelatin will dissolve evenly without clumping when heated.
2. Dissolving the Gelatin: After blooming, place the bowl in a microwave and heat it for about 10-15 seconds. Alternatively, you can place the bowl over a pot of simmering water (double boiler method). Stir the gelatin until it is completely dissolved and clear. Avoid overheating, as excessive heat can affect the gelatin’s gelling properties.
Adding Flavor
Incorporating orange juice and zest into your cheesecake filling is what gives it that signature creamsicle flavor. Here’s how to do it effectively:
1. Choosing the Right Orange: For the best flavor, select fresh, ripe oranges. A navel orange or Valencia orange works well for this recipe.
2. Juicing and Zesting: Using a microplane, zest the orange until you have about 2 tablespoons of zest. Then, juice the orange until you have about 1/2 cup of fresh juice. To get the most juice, roll the orange on the counter with your palm to break down the cells before cutting it.
3. Incorporating into the Filling: In a mixing bowl, combine the softened cream cheese, powdered sugar, and the bloomed gelatin. Gradually add the orange juice while mixing on low speed to prevent splattering. Follow with the orange zest. Mixing these ingredients on low helps to maintain the texture and avoid overmixing.
Whipping the Cream
Achieving the right texture in your whipped cream is essential for the cheesecake to be light and fluffy. Here’s how to whip cream effectively:
1. Chill Your Tools: Before whipping, chill your mixing bowl and beaters in the refrigerator for about 15 minutes. Cold equipment helps the cream whip faster.
2. Using Heavy Cream: Pour 1 cup of heavy cream into the chilled bowl. Begin by mixing on low speed to avoid splashing, then gradually increase to medium-high speed.
3. Whipping to Stiff Peaks: Whip the cream until stiff peaks form. This means that when you lift the beaters out of the cream, the peaks stand straight up without drooping. Be careful not to over-whip, as this can turn the cream into butter.
Folding Techniques
Folding is a gentle mixing technique that helps integrate the whipped cream into the cheesecake mixture without deflating it. Here’s how to do it right:
1. Adding Whipped Cream: Once your whipped cream is ready, take a third of it and stir it into the cream cheese mixture. This helps lighten the mixture.
2. Folding: Then, add the remaining whipped cream. Using a spatula, gently cut through the mixture, going down to the bottom of the bowl and folding it over the top. Rotate the bowl as you fold to ensure even incorporation. Repeat until just combined; it’s important to maintain the airy texture of the whipped cream.
Assembling the Cheesecake
With your filling prepared, it’s time to assemble your cheesecake:
1. Pouring the Filling: Carefully pour the orange cream filling into the prepared graham cracker crust. Use a spatula to spread it evenly and smooth the top.
2. Smoothing the Top: Once the filling is in the crust, gently tap the cheesecake on the counter to remove any air bubbles. You can also use the spatula to create a decorative swirl on top if desired.
3. Refrigeration: Cover the cheesecake with plastic wrap and refrigerate for at least 4-6 hours, but preferably overnight. This allows the gelatin to set properly, giving you a stable cheesecake.
Serving Suggestions
Once your cheesecake has set, it’s time to serve! Here are some ideas to make it look as good as it tastes:
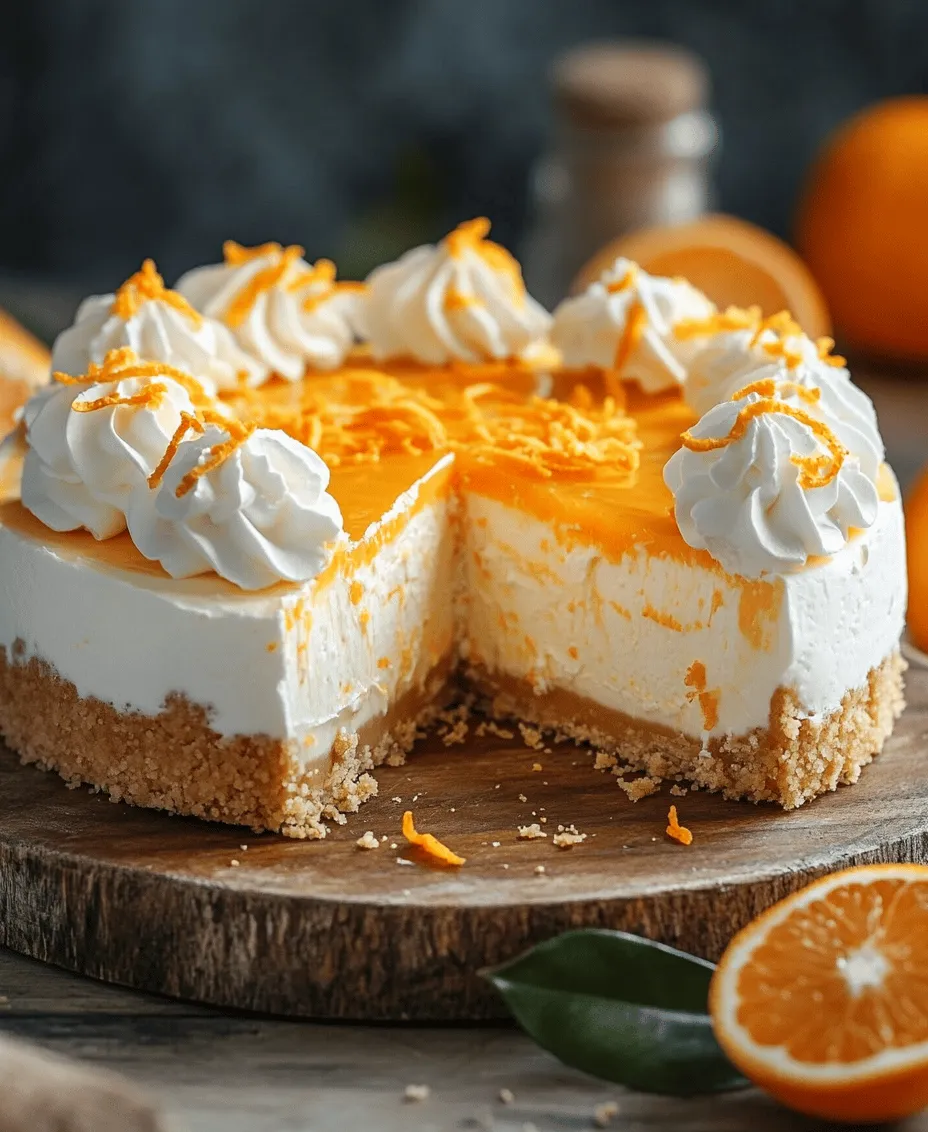
1. Garnishing: Top your cheesecake with additional orange zest for a burst of color and flavor. You can also add a dollop of freshly whipped cream or even some candied orange slices for an elegant touch.
2. Serving Temperature: Serve the cheesecake chilled for the best flavor and texture. If it has been stored in the refrigerator, allow it to sit at room temperature for about 10-15 minutes before slicing for easier cutting.
3. Presentation Styles: Consider serving individual slices on small dessert plates, or for a more casual option, cut the cheesecake into squares and serve on a platter, allowing guests to help themselves.
Storage and Shelf Life
Storing your No-Bake Orange Creamsicle Cheesecake properly will help maintain its delicious flavor and texture:
1. Best Practices for Storage: Keep any leftovers covered in the refrigerator, either with plastic wrap or in an airtight container. This helps prevent the cheesecake from absorbing any odors from the fridge.
2. Shelf Life: The cheesecake can be kept in the refrigerator for up to 5 days. However, for the best taste and texture, it’s recommended to consume it within 3 days.
Nutritional Information
Understanding the nutritional content can help you enjoy this dessert within your dietary preferences:
1. Breakdown of Calories: A standard slice of No-Bake Orange Creamsicle Cheesecake (about 1/12th of the total recipe) contains approximately 300 calories. This can vary based on the specific brands and measurements used in your recipe.
2. Nutritional Content: Each slice typically contains around 20g of fat, 30g of carbohydrates, and 4g of protein. The orange juice and zest add vitamins and antioxidants, making this cheesecake a more nutritious option than some baked desserts.
3. Dietary Preferences: This cheesecake is suitable for those who enjoy a creamy dessert without the need for baking. It can also be made gluten-free by using gluten-free graham crackers for the crust.
Conclusion
Making No-Bake Orange Creamsicle Cheesecake is not just an enjoyable cooking experience, but it also results in a refreshing and delightful dessert that’s perfect for summer gatherings or special occasions. The combination of creamy filling, zesty orange flavor, and a buttery crust creates a well-balanced treat that everyone will love.
Whether you are hosting a party or simply indulging yourself, this cheesecake stands out with its vibrant flavor and pleasing texture. So don’t hesitate to give this easy recipe a try and share it with your friends and family. The smiles and compliments you will receive are sure to make the effort worthwhile. Enjoy every slice!